6 Reasons to Use Blood Meal in Your Garden
July 1, 2022
admin
6 Reasons to Use Blood Meal in Your Garden
 Looking for a new plant food that supports luscious foliage, gives plants a quick boost for healthy growth, and builds the long-term wellness of your soil? Blood Meal is a perfect choice.
If you’ve never used Blood Meal before, it may sound intimidating. Rest assured, just like every other True Organic product, our Blood Meal is easy to use, food safe, and supportive of both plants and soil.
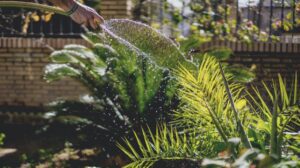
1: Blood Meal is an easy-to-apply, dry amendment.
As True Organic’s Director of Research & Development, Ehsan Toosi, PhD, puts it, “The Blood Meal you get in a True Organic bag doesn’t resemble blood in any way.”
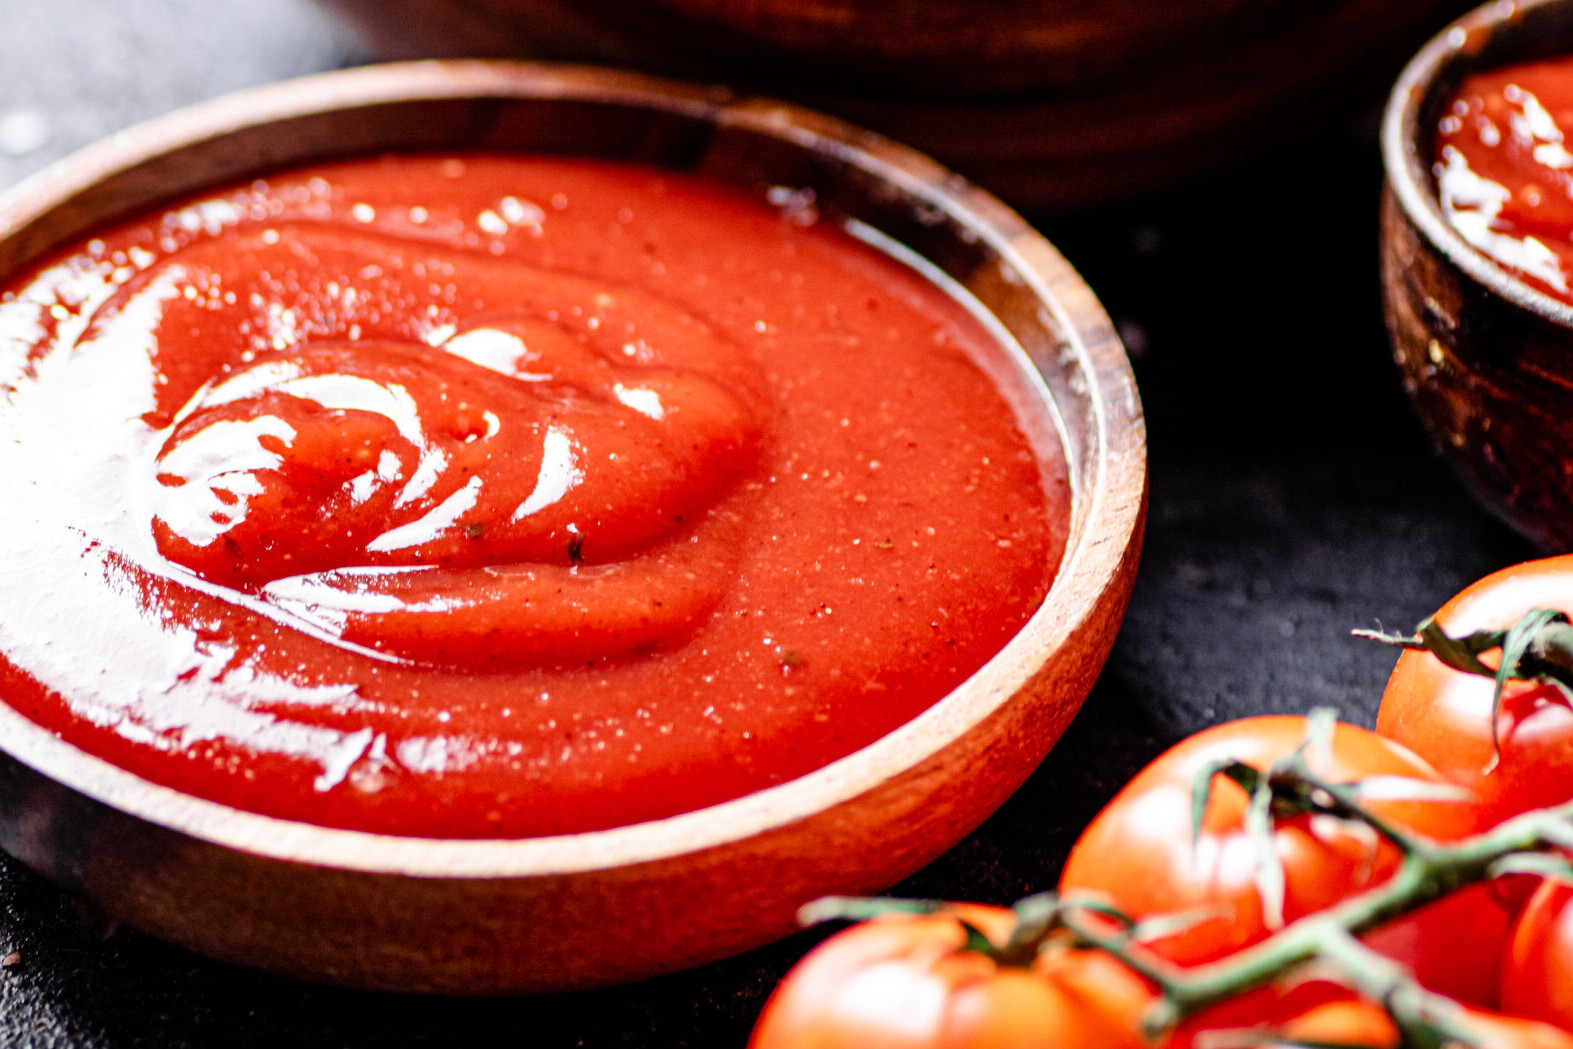
So what exactly is Blood Meal? The name really does explain it all. Blood Meal is a dry amendment made from animal blood — in our case, cows. Blood is dried, processed, and packaged into a granular fertilizer that’s simple to apply, just like any other.
2. Blood meal is an amazing source of nitrogen.
This natural resource is very rich in nitrogen and gives plants a quick-release supply of this vital nutrient. Nitrogen is an essential macronutrient for plants’ photosynthesis process and supports luscious foliage. It helps plants grow fast, strong, and green!
Good nitrogen content in soil will result in lush, green leaves and healthy plant growth and fruiting. Yellow, withered leaves are often a sign of too little nitrogen in soil.
Nitrogen also helps lower the pH of soil, so acid-loving plants benefit from blood meal applications.
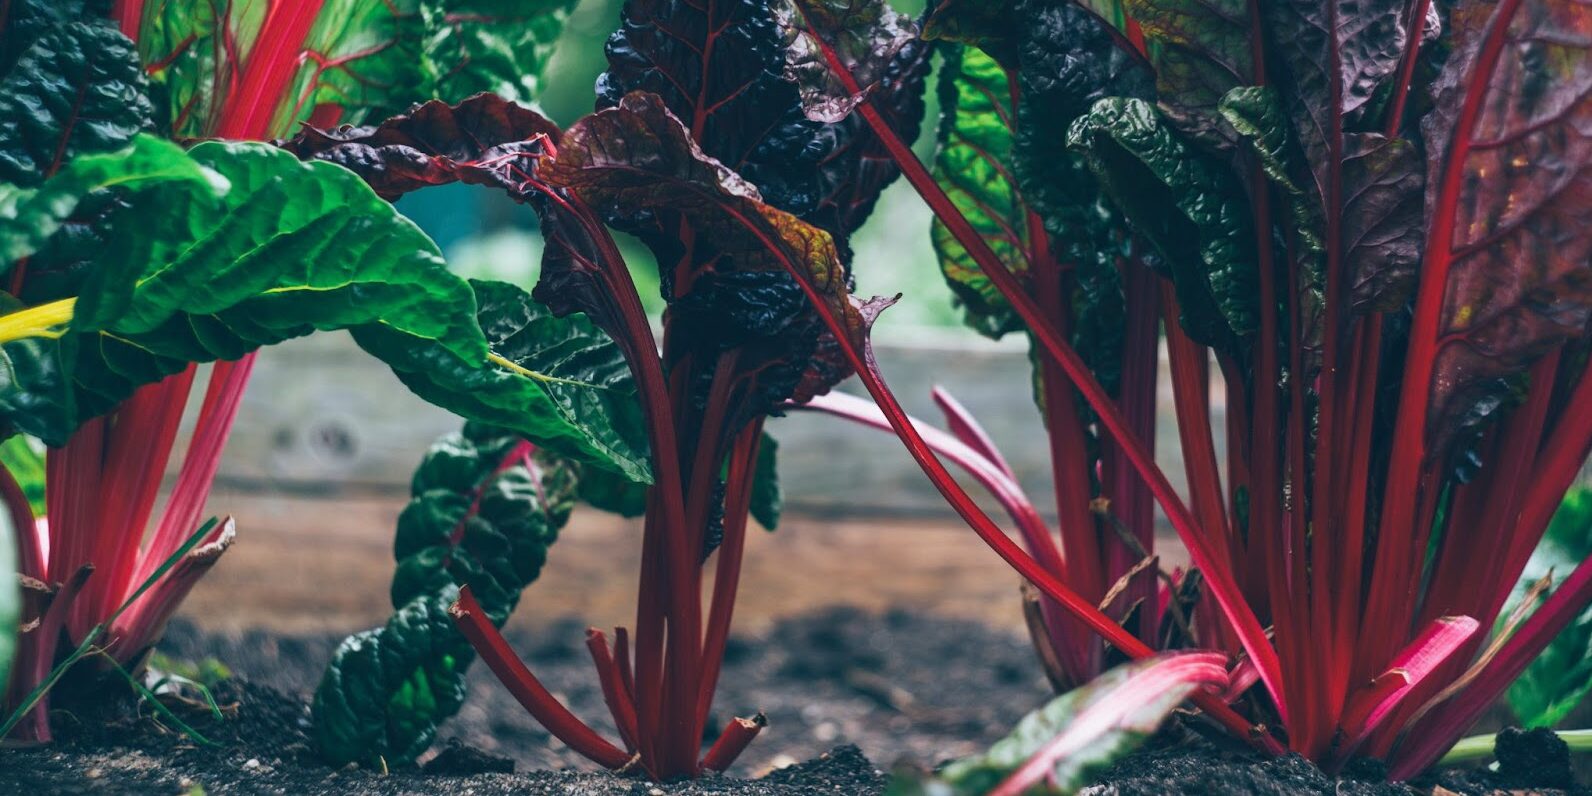
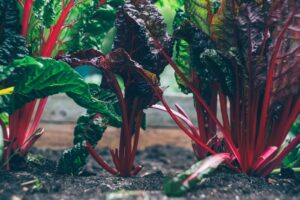
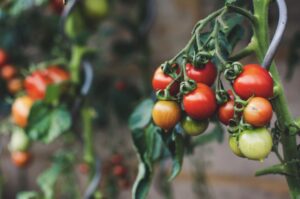
That makes it perfect for heavy feeders like corn, broccoli, spinach, and other leafy greens.
Just be mindful of how much you apply! Because blood meal has such a concentration of nitrogen, over-applying is detrimental to plants. Too much nitrogen in your soil can damage or even kill your plants! Follow the application instructions on the back of the bag carefully.
3: True Organic Blood Meal is sustainably sourced.
 The cow blood we use for True Organic Blood Meal comes from slaughterhouses that are using other parts of the animal for other finished products. By utilizing a natural by-product of the cattle industry, we’re doing our part to ensure that nothing is wasted.
“When you think about it from the big-picture perspective, we’re upcycling undesirable waste,” Ehsan Toosi says.
True Organic has always been committed to a sustainable approach — it’s why we do what we do. We know the planet’s resources aren’t infinite, especially when it comes to agricultural resources. But with thoughtful production and good research, our industry could be the most influential link to a sustainable future on Earth.
4: True Organic Blood Meal is food safe.
Just like every other True Organic product, our Blood Meal goes through rigorous safety processes to ensure we bring you the safest and highest-quality plant foods on the market.
Of course, we know you’d never intentionally consume plant food! But think of it this way: what you apply to your edible garden will eventually end up on your dinner plate.
We’re proud to be a worldwide leader in food safety, with diligent safety measures certified by Bureau Veritas, a world leader in testing, inspection, and certification services. Read more about our food safety practices and what that means for your garden (and your kitchen table).
5: Blood Meal helps rebuild challenged soil.
Sure, Blood Meal gives your home garden a quick shot of much-needed nitrogen — but one of the best things about Blood Meal is how much it bolsters long-term soil health.
“In a soil that’s sandy and doesn’t have a lot of natural fertility to it, Blood Meal is a good choice because it has a low carbon-to-nitrogen ratio,” our Vice President of Research & Development, Ramy Colfer, PhD, says.
Thanks to its high nitrogen content, Blood Meal infuses soil with helpful nitrogen over a long time (although our Blood Meal is not a slow-release source of nitrogen because of how it’s processed). As Blood Meal decomposes in soil, it gradually supplies nitrogen to microbes and plants for a period of several weeks to a few months, depending on conditions.
And for gardeners who use compost with a lot of brown/carbon-heavy material (leaves, grass clippings, paper, etc.), Blood Meal is a great addition. It will help balance the soil’s carbon-to-nitrogen ratio so plants can thrive.
6: Blood Meal might keep pests away.
Yes, might.
While it’s not a proven method, many gardeners over the ages claim that using blood meal helps deter pest animals like squirrels, deer, and rabbits (Rodale’s Ultimate Encyclopedia of Organic Gardening, 2017). It’s said that these animals dislike the smell of blood. It’s worth a shot!


Show us your True Organic Plants
#GrowWithTrue

www.trueorganic.earth
Food Safety for Safer Edible Gardening
June 6, 2022
admin
Food Safety Standards for Safer Edible Gardening
 You care about food safety testing for the fresh produce you buy at the supermarket. You want to make sure the food you bring home for your family table is free of pathogens and other potentially harmful ingredients.
Food safety might not be something that crosses the mind of most home gardeners, but let’s put it into perspective.
All food products are tested to make sure they are pathogen-free. That way, consumers trust that the romaine lettuce bought from the market and the chicken fingers your kiddos love are safe. Restaurants, food manufacturers and processors are all expected to have food safety measures in place for the same reasons.
Shouldn’t all the same standards apply to products that come into contact with our food? That’s our philosophy at True Organic.
17 Years of Industry Standards
 When it comes to food safety standards, the agricultural industry has more regulation than the retail consumer industry. And because we’ve been providing fertilizer to the nations’ biggest organic farms for 17 years, our food safety protocol is backed by decades of expertise.
“We consider ourselves part of the food chain —so whatever a food manufacturer is doing, we are doing something equivalent,” says Mike Menes, True Organic’s VP of Food Safety and Technology.
Why Food Safety?
Much of the food you grow in your home garden is eaten raw, so whatever comes into contact with the edible part of the plant ends up in your salad.
If you’re eating what you’ve grown in your garden, the fertilizer you’re using comes into contact with your food. Which means that pathogens that can be transferred by untreated or improperly treated inputs including plant and animal byproducts, so rinsing or washing those items you pick in the kitchen sink just doesn’t cut it.
Every one of True Organic products is ISO 22000 food safety certified for safer edible gardening. What does that mean for you? Let’s take a look at some important parts of our wide-ranging food safety program.
Believe it or not, there are no regulatory standards regarding food safety and pathogen testing in the retail consumer fertilizer industry! But at True Organic, food safety has been part of our mission and our methods from the very beginning.
Understanding ISO 22000 & Bureau Veritas
Bureau Veritas is the third-party certification partner that audits every part of our manufacturing methods — from facility practices to packaging. Founded in 1828, Bureau Veritas is a world leader in testing, inspection, and certification services.
Read more about Bureau Veritas and their globally renowned standards.
ISO 22000 is the food safety management system that True Organic uses. ISO 22000 sets out the requirements for what an organization needs to do to demonstrate its ability to control food safety hazards in order to ensure that the product is safe. Currently, there are no food safety manufacturing standards for organic fertilizers and True Organic opted to follow a food standard that could be applied to our process. We chose to pursue ISO 22000 because of their reputation, applicability, and the international relevance.
Read more about the ISO 22000 standards here.

True Organic’s Industry-leading Practices
We have established some very unique practices to ensure that our methods go beyond the minimum standards and bring you the safest and highest-quality plant foods on the market.
HACCP Plan
A Hazard Analysis and Critical Control Points (HACCP) is another type of management system that we have in place. Unique to industry and facility, a HACCP plan is a crucial part of addressing safety through the analysis and control of biological, chemical, and physical hazards. This plan includes every step of our process, from raw material procurement, storage, and handling, to manufacturing, distribution, and even consumer use.
Process Separation & “Kill Step”
Just like you are sure to wash your hands, knives, and cutting board after handling raw meat, we ensure that the handling of raw materials is separated from every other step of the manufacturing process.
The “kill step” is a food safety term for putting materials through high heat to “cook” off any pathogens. This is a crucial part of the process that can be compared to washing a cutting board and cooking the meat in your kitchen.
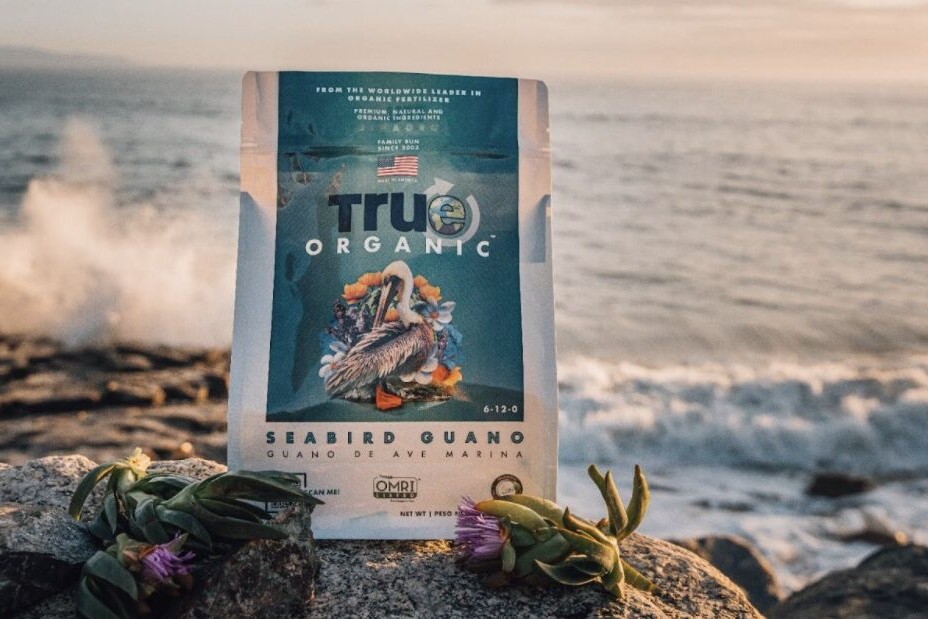
The fact is that many animal byproducts are time-tested fertilizing agents. Ingredients like guano, manure, blood, and bone have been used as powerful agricultural fertilizers for centuries. (Seabird Guano is a prime example. Learn more about our Seabird Guano and how we ethically and safely harvest it.)
Start-to-Finish Oversight
From start to finish, we are in control of the product that makes its way to your garden. We like to think of it as “source to soil” transparency. This continuity and ownership gives us visibility into and control of every single step of the process, which is not the case when a company uses dispersed third-party partners to source, manufacture, or package their product. We know exactly what goes into True Organic plant foods and exactly what’s in each package.
Company Commitment
“This commitment has 100% backing from the top down,” says our food safety expert, Mike Menes. “It’s aligned with the vision and direction of True Organic and [our founder] Jake Evans.
In fact, Mike came to True Organic from a long-time career in food safety testing. He’s expertly transferred that knowledge to our organic fertilizer manufacturing to ensure that our safety standards are top-of-the-line.
We think our most powerful tool to guarantee food safety for our customers and their families is our team’s commitment to quality and safety. We hope to lead the way in our industry toward a culture of food safety, so you have one less thing to worry about when it comes to choosing how to nourish your garden.
Show us your True Organic Plants
#GrowWithTrue
www.trueorganic.earth

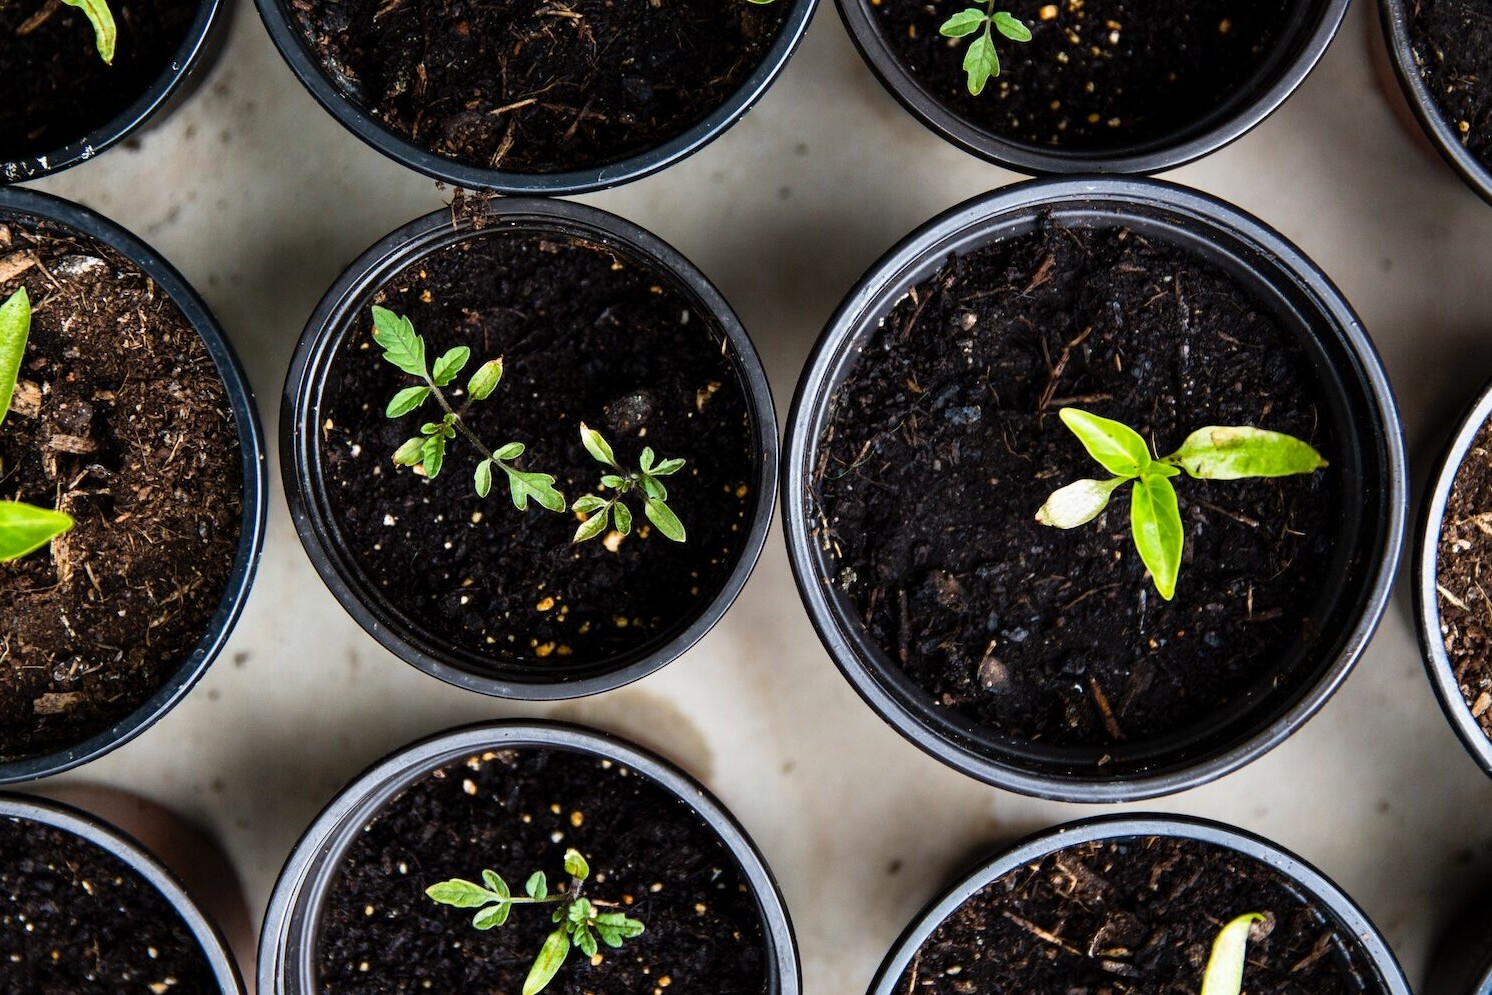
Easy Plant Propagation Tips for Beginners
June 3, 2022
admin
Easy Plant Propagation Tips for Beginners
Want some new plants without buying any? Propagation is a delightful part of being a plant parent and can fill your house (and your friends’ houses) with endlessly multiplying plants.
If you’ve grown succulents from cut leaves, helped a pothos sprout new roots in water, or divided the roots of a too-crowded potted plant, then you’re already experienced in plant propagation.
Basics of Plant Propagation
So what exactly is plant propagation? A simple way of putting it: Propagating is the process of making more plants without seeds. The scientific explanation: Propagation is asexual plant reproduction.
In real-world terms, plant propagation means you’re getting more new plants just from one single plant parent. Yes, plant propagation is cloning!
For the most success, follow a few basic tips when multiplying your plants:
- Propagate during a plant’s typical growing season (typically spring and summer).
- Always use clean, sterilized tools for cutting and separating.
- Gather all your equipment before you start.
- Avoid exposing bare roots and fresh cuttings for too long; get your new plants in soil or water immediately!
- Care for your newly propagated plants carefully and with kind attention. They’re brand new babies!
Plant Propagation Methods
There are a wide variety of methods for plant propagation. Which process you’ll use is up to the kind of plant you’re working with and what equipment you have available. Let’s go over the most common techniques to help you get the best results every time.
Root Division
Division is the process of separating one plant into two or more at the roots. It takes patience, attentiveness, and dexterity, so it’s best to choose this method once you already have a bit of experience with plant propagation, repotting, and caring for new plants.
Lay out all the equipment you need beforehand. You don’t want your plant’s exposed roots drying out while you find your container, soil, and tools!
Start by gently removing the parent from its pot and placing it on a clean surface or towel. If the root ball is very densely packed, delicately shake or “tickle” the roots to help them get a bit looser.
Examine the root mass for places that are healthy and can be separated relatively easily. You may need to cut the plant’s roots to separate them. If you do, be sure you use a very sharp, very clean tool. Be gentle! Make sure that the roots stay intact.
It’s important to replant the divided plants as soon as possible in new potting soil.
Best plants for root division:
- Pilea peperomioides
- Many types of ferns
- ZZ plant
- Snake plant

Stem Cuttings
Propagating a new plant from a cutting is probably the most popular method of multiplying houseplants. And it’s pretty simple if you follow a few rules:
- Take cuttings from healthy stems and plants only!
- Don’t cut from stems when they’re flowering.
- Cut below leaf nodes.
- Cut with a very sharp, clean tool.
To get the best cutting, first clean (and perhaps sharpen) your cutting tool. Garden shears, knives, or kitchen scissors work best.
Find a new leaf node, the bumpy joint along a stem. Locate a healthy, sturdy stem with rich color and happy, springy leaves.
Try to find a node that is at least 3 inches away from the top leaf. Cut just below the node (closer to the plant’s roots). Your new plant’s roots will start to grow from this node.
You can either root your new cutting in water or directly in soil! If you place the cutting directly into soil, plant it in a very small hole that’s snug for the stem. We like to use a pencil or crochet hook!
Best plants for growing from stem cuttings:
- Pothos
- Tradescantia
- Umbrella plant
- Philodendron
Leaf Cuttings
There are a few plants, including most succulents and cacti, where plant propagation can happen just from a leaf.
This process is tricky, and success rates can be lower than other methods, so don’t beat yourself up if it doesn’t work out on your first try (or second, third, and so on…).
Just like cutting from a stem, locate a leaf that is very healthy, sturdy, and “springy.” If you’re working with succulents, leaves may simply fall off — you can propagate those!
Cut the leaf off the stem and let the leaf dry out for 2-3 days, just enough so to slightly scab over. This will prevent the leaf from soaking up too much water and rotting.
Place the leaf into fresh potting soil, with at least one-third of the leaf in the soil. Gently press your fingers all around the inserted leaf to firmly ground it in the soil.
Best plants for growing from leaf cuttings:
- Aloe vera
- Jade plant
- Most types of cacti
- Most types of succulents

Plantlets
Also called pups or offsets, pups are itty bitty baby plants that naturally sprout from the mother plant. Pups are “ready-to-go” miniature plants that naturally form at the ends of branches or vines.
Spider plant (Chlorophytum comosum) is likely the most commonly pup-growing plant. Have you seen the tiny, spiky orbs dangling from a big spider plant? Those are its pups!
Plant propagation from a pup is similar to growing from a cutting. Below the soil, remove the pup’s connecting roots from the mother plant with a sharp, clean blade and plant it in nutrient-rich potting soil.
Just like stem cuttings, you can root plantlets in soil or in water. All of the other rules for propagating apply: clean your tools, plant in rich soil, and choose healthy plants and pups only.
Best plants for growing from pups:
- Spider plant
- Bromeliad
- Tillandsia (air plants)
- Aloe
Caring for New Baby Plants
Now you’ve got some new pants to care for!
Remember: Plant propagation is major surgery. Give your plant lots of love and attention: place it in bright light, away from cold drafts, and make sure to water it immediately. Soil should be kept moist but not damp. Be mindful not to overwater your new plant because that waterlogs the roots and doesn’t allow them to breathe fully.
If you’re rooting new plants in water, give them fresh water every couple of weeks to avoid unwanted bacterial or fungal growth. After roots are a few inches long, you may want to pot the fledgling plant in soil. But you don’t have to — some hardy houseplants can grow in water indefinitely (and now you’re cultivating with an aquaponics operation!).
The post-plant propagation period can be a slow-growth time for your new plants, so be patient. You may not see new growth or super-springy stems right away.
Pro tip: Give your new green babies a small dose of our Liquid All-Purpose Plant Food during their first or second water after planting in soil to help them stay healthy.
The best part of plant propagation? Gifting your newly rooted plants! They make perfect housewarming presents or work-from-home officemates.
Happy growing!
Show us your True Organic Plants
#GrowWithTrue
www.trueorganic.earth

4 Awesome Apps to Grow Your Best Garden Ever
May 16, 2022
admin
4 Awesome Apps to Grow Your Best Garden Ever
Are you a data-loving gardener ready to take your outdoor habitat to the next level? Plan, plant, care for, and harvest your best garden ever with these unique apps created with you in mind.
Even the most skilled gardeners know that growing plants is both an art and a science — but perhaps more of a science! Routine, patience, observation, innovation, and good tracking systems are key parts of keeping a flourishing garden.
Whether you’re growing vines or veggies, flowers or grasses, a digital gardening tool can help you bring it all together. Here are our favorites!

Garden Journal by Territorial Seed Company
This app is jam-packed with tools for an epic garden, including one of the most extensive garden journal trackers we’ve ever seen. Track what you’ve planted, when to water, when to prune, pest appearance, weather, and more, and add photos.
One of our favorite parts of the Garden Journal app is the robust and easy-to-access expert advice. The pest prevention and treatment library is mind-boggling in its volume and eco-friendly tips (explore it on their website, too!). Plus, you’ll have access to weather forecasts and growing advice for almost 200 veggies, herbs, and fruits. It’s a gardener’s dream! Garden Journal is free, but you can upgrade to get email reminders and access its garden layout tool.

Gardening Companion by Gardening Know How
Think of the GKH Gardening Companion app as your personal garden assistant.
With a wealth of gardening information at your fingertips, Gardening Companion provides easy access to a huge swath of articles, tips, photos, and videos. You can even tag your favorites and organize by theme to curate your own personalized garden reading list.
Track your garden’s progress with the built-in garden journal and reminder alerts for planting, watering, fertilizing, and more.
For social butterflies and online networkers, Gardening Companion will be a favorite. This app also links in a fun social component: save and share your gardening content through email, Facebook, Twitter, and Pinterest.
Garden Plan Pro
Dream, create, and grow your garden with Garden Plan Pro.
This powerful app is the top of the line when it comes to planning and understanding your garden. All types of gardening enthusiasts will love the in-depth information on planting advice, layout and drawing tools, and crop rotation alerts.
Information from over 6,500 weather stations in 20 countries help recommend planting and harvest date recommendations, adapted to your climate.
Garden Plan Pro is completely suitable for novice gardeners, but gardeners who are ready to expand their horizons and zoom in with extra precision will love this app!

iNaturalist
This one is for the citizen scientist gardeners!
iNaturalist was developed in partnership by the California Academy of Sciences and the National Geographic Society to help everyday plant lovers like you connect, learn, and grow.
iNaturalist features a place to record your observations of plants, insects, and more — then crowdsources with expert and other citizen scientists to help identify and understand your environment. Become a part of a worldwide community of nature-lovers and gardening enthusiasts while you learn about your own backyard.
Why are we including a naturalist app in our list of great garden apps?
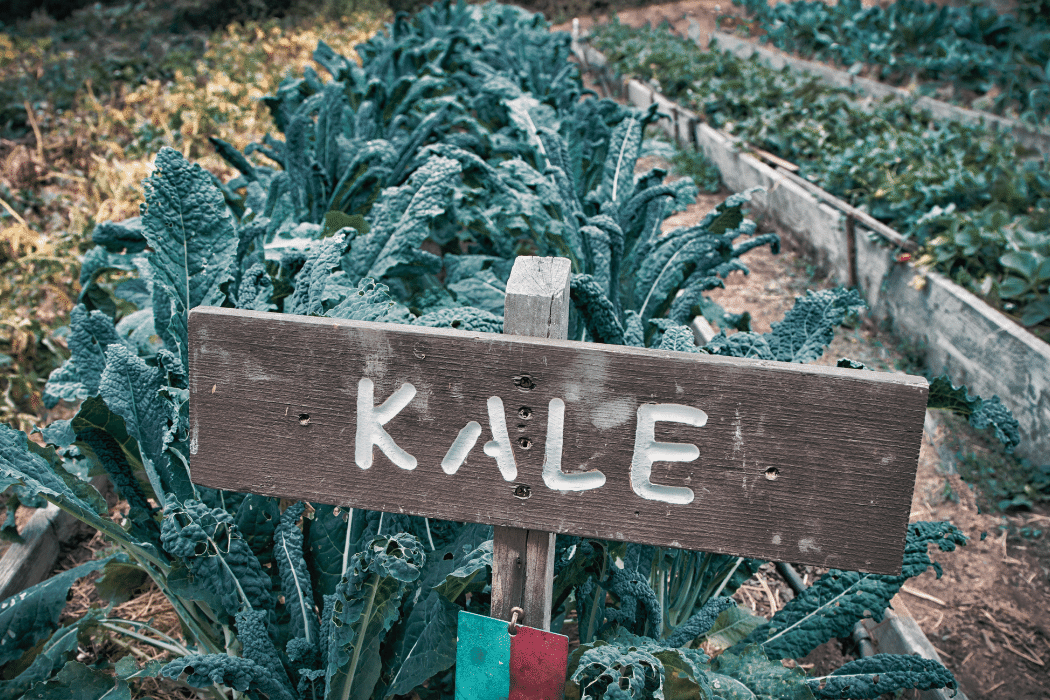
Because being a successful gardener means relating to the whole ecosystem around you, including plants, pollinators, microorganisms, and animals. When you can quickly identify the bug that’s devouring your kale, it’s a lot easier to figure out a pest solution.

Show us your True Organic Plants
#GrowWithTrue
www.trueorganic.earth
Should I Use Liquid or Granular Plant Food?
July 5, 2022
admin
Should I Use Liquid or Granular Plant Food?
When it comes to choosing which plant food is perfect for your at-home gardening project, it’s best to start with the most basic choice: liquid or granular?
While it may come down to personal preference or past experience, there are a few deciding factors that distinguish granular plant foods from liquids.
Start by considering the basics:
- Where are you using it? Indoor or outdoors?
- Are you growing in containers, raised beds, in-ground, or another method?
- What kind of types of nutrients are you looking for (Nitrogen, Phosphorus, Potassium, and more)?
- How fast do you need to get nutrients to your plants?
- Are you treating a specific problem? Or aiming for general nutritional support throughout the growing season?
- What’s your watering method?
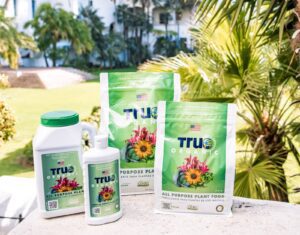
When it comes down to it, our liquid and granular or dry plant foods are more similar than they are different. All True Organic™ plant foods contain specific macro- and micro-nutrients that plants and soil need.
Liquid and granular plant food varieties are both:
- Full of specific macro- and micro-nutrients that plants need
- Supportive of soil health by nourishing the microbes that live in soil
- Great for indoor and outdoor use
- Rigorously tested for food safety and certified ISO 22000
What’s The Difference Between Liquid or Granular Plant Food?
What sets them apart (besides the fact that one is liquid and one is solid) has more to do with how each is applied and how their material differences fit with certain types of gardens and planting methods.
Liquid and granular plant food differ in their:
- Immediate nutrient availability
- Nutrient availability over time
- Best application methods
- Single-ingredient options
Safe for Indoor & Outdoor
Both liquid and granular plant foods can be successfully and safely used for your indoor and outdoor plants, but many people prefer to use liquid for houseplants and seed starts. Yep, our plant foods are safe to use in your houseplants, even around kids and pets!
A commitment to food safety is one of our core values. We’re proud of the fact that we’re the first plant food manufacturer to be ISO 22000 certified by Bureau Veritas (a world-class food safety management seal of approval). Every single True Organic product is tested and certified safe — liquid and granular, single-ingredient, and blends.
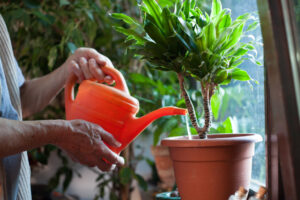
Liquid for Houseplants
Houseplants love liquid plant food! And so do we, because it’s just so easy to measure and apply.
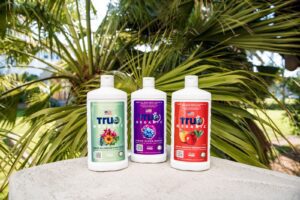
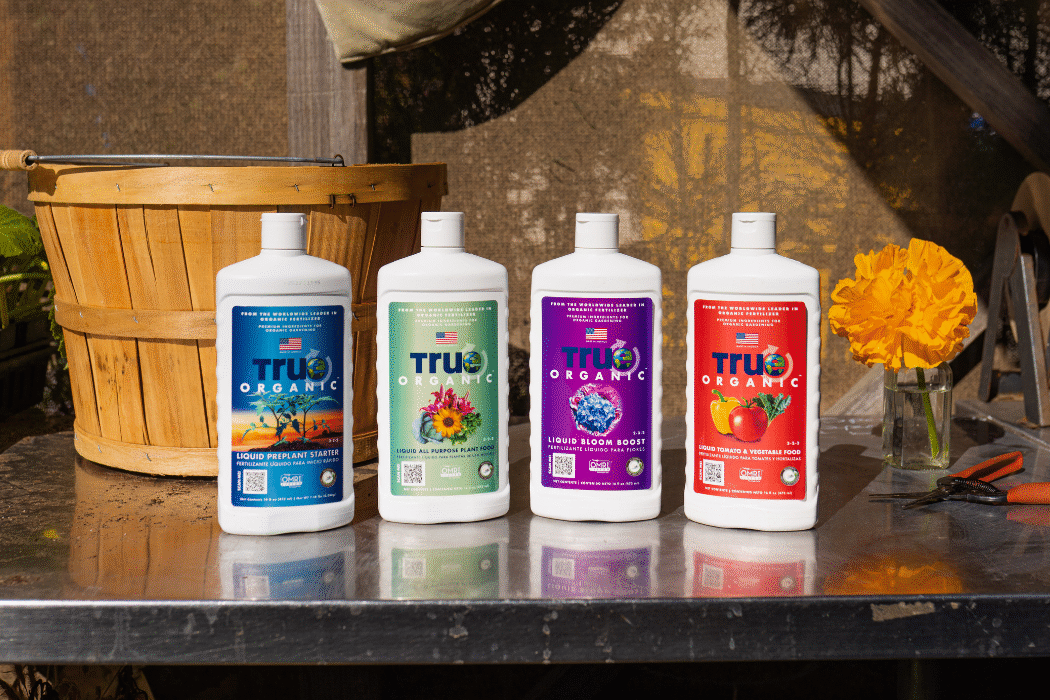
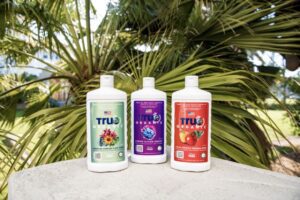
Giving plants a precisely measured dose of liquid plant food is as simple as measuring, mixing, and watering. For houseplants, we recommend our Liquid All Purpose Plant Food.
Because liquid is easy to use, though, it can be tempting to add too much. Remember that it’s essential to measure your fertilizer and apply it on a schedule.
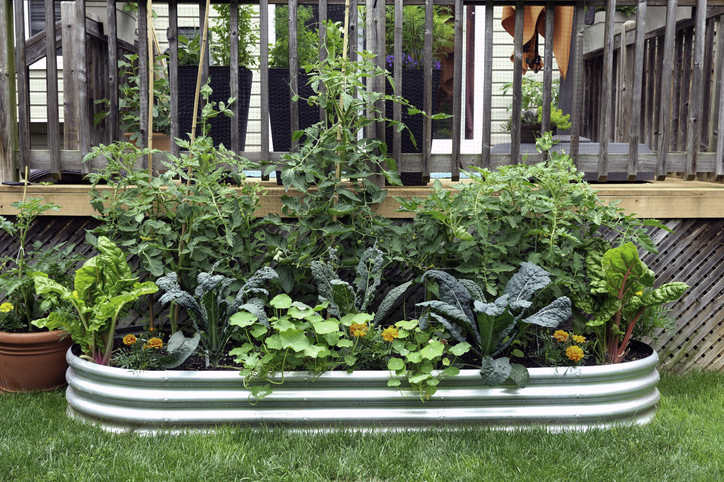
 Starting Raised Beds & New Containers
Starting a new container garden or raised beds? Granular plant food is your best friend. In fact, we made a plant food just for your raised bed crops to support vegetative growth with a healthy boost of nitrogen.
Work dry plant food into the first few inches of your raised beds and big boxes in early spring, and over the next weeks and months, it’ll become available for plants as they grow.
“I put a little dry food into the potting mixture so that nutrients are being released over time,” says Margaret McCoy, our R&D Agronomist.
A good, thorough mixing as you start new beds and containers will ensure that your granular plant food is well-distributed throughout your growing medium.
Drip Irrigation
Do you have a drip irrigation system in your outdoor plant habitat? Liquid plant food is perfect for that! Simply add liquid food in at the starting point of your system and let the system do the rest.
“The great thing about liquids,” says Margaret, “is that you can water them into the pot or soil profile or they can be incorporated directly into watering solutions.”
Nutrient Availability
Do you have plants that need a boost right away? Liquid can help.
Liquid plant foods tend to be more readily available, meaning that plants can more quickly “absorb” the nutrients with each dose of liquid plant food than they can with dry supplements. Dry products generally take more time and energy to be broken down and become chemically available for plants to pick up.
Margaret says, “I use liquids outdoors when I want the plant to get nutrients quickly or I see that there’s an issue — or I want to boost something like blooms or general production.”
You may not see results right away, but that doesn’t mean your plants aren’t feeling the boost of nutrients. (Just another remind to not overdo it with the plant food.)
Ready To Choose?
True Organic plant food is available at more local retailers than ever! Find yours with our convenient store locator or explore our online store.

Show us your True Organic Plants
#GrowWithTrue
www.trueorganic.earth
Garden Journaling: Your Key Spring Planning Tool
March 31, 2022
admin
Garden Journaling: Your Key Spring Planning Tool
A garden journal is just what it sounds like: a record of information about your garden. These might be lessons you’ve gleaned from past seasons, a layout of your crops, a record of your plant food applications and waterings, or any combination of tidbits that you want to remember.
Thinking about creating a record-keeping system for your gardening season but don’t know where to start? You’ve come to the right place!
 Create Your Own Garden Journal
If you find it stressful to start from a blank page, you can find numerous templates for your garden journal online.
Search for your favorite free printable garden journal template here, or find a prepared journal in a local garden store, bookstore, or online.
There are a plethora of garden-tracking apps for your smartphone and online templates, too. But just like we like to get our hands in the soil, we prefer the feel of a pen and paper.
If you’re motivated to start a garden journal from scratch, all you need is a simple notebook to get started! Make sure the pages are big enough to record what you need and that your notebook is sturdy enough to withstand lots of use — and some outdoor time.
Some gardeners prefer a three-ring binder with loose-leaf paper, which allows you to keep growing your journal as long as you want — and allows you to add other elements like printed pages, seed packets, and more.
What you choose to create is up to you. One thing’s for sure: your garden journal can become a place that brings you joy and inspiration, just like your garden.

What Should I Record In My Garden Journal?
Keep in mind that your garden journal is as unique as your garden. What you choose to record is up to you, and might change over time.
There are a few must-haves for garden journal info:
- Garden layout
- Planting/sowing dates and techniques
- Fertilizing schedules and results
- Watering schedules
- Plant health
- Pest problems
- Rainfall
- Other weather changes
- Harvest yield
- Successful or unsuccessful plants and varieties
If you’re ready to look at more advanced garden information you might add:
- Bloom and harvest info and dates
- Pruning and deadheading timelines
- Netting, staking, and other garden infrastructure
- Crop rotations
- First dates (first and last)
- Sun exposure
- Favorite (and not-so-favorite) products
- Expenses
- Soil health info (Check out our guide to soil testing for a deep look at what it can tell you about your garden.)
Make your garden journal a creative space by adding:
- Photos
- Sketches
- Seed packets and tags
- Inspirational clippings from magazines to envision your dream garden!

Why Keep A Garden Journal?
Of course, there is an obvious answer: to keep a record of what worked and what needs adaptation to grow the most vibrant, prolific garden you can get. As with any hobby, habit, or practice, keeping track of our experiments and experience in the garden helps us keep improving. It makes us more efficient as we learn to see patterns, making changes with each new season.
Plus, there’s something about tracking your daily life with the plants, soil, water, and sun that just feels good.
What do you most want to get out of your garden journal?
Are you looking to increase your harvest? Improve soil health? Simply learn about your property, climate, and plants? Start there to figure out what you want to record and how to lay out your journal.
You might already know that routine improves your life — perhaps you have a bedtime routine that helps soothe your nervous system and lets you really feel like your day is winding down or, conversely, a morning routine that kicks you into gear.
Keeping a garden journal can be just like that: a daily or weekly routine that gets us in touch with changing seasons, our connection to the land, and the reciprocal relationship between humans and soil.

Show us your True Organic Plants
#GrowWithTrue
www.trueorganic.earth
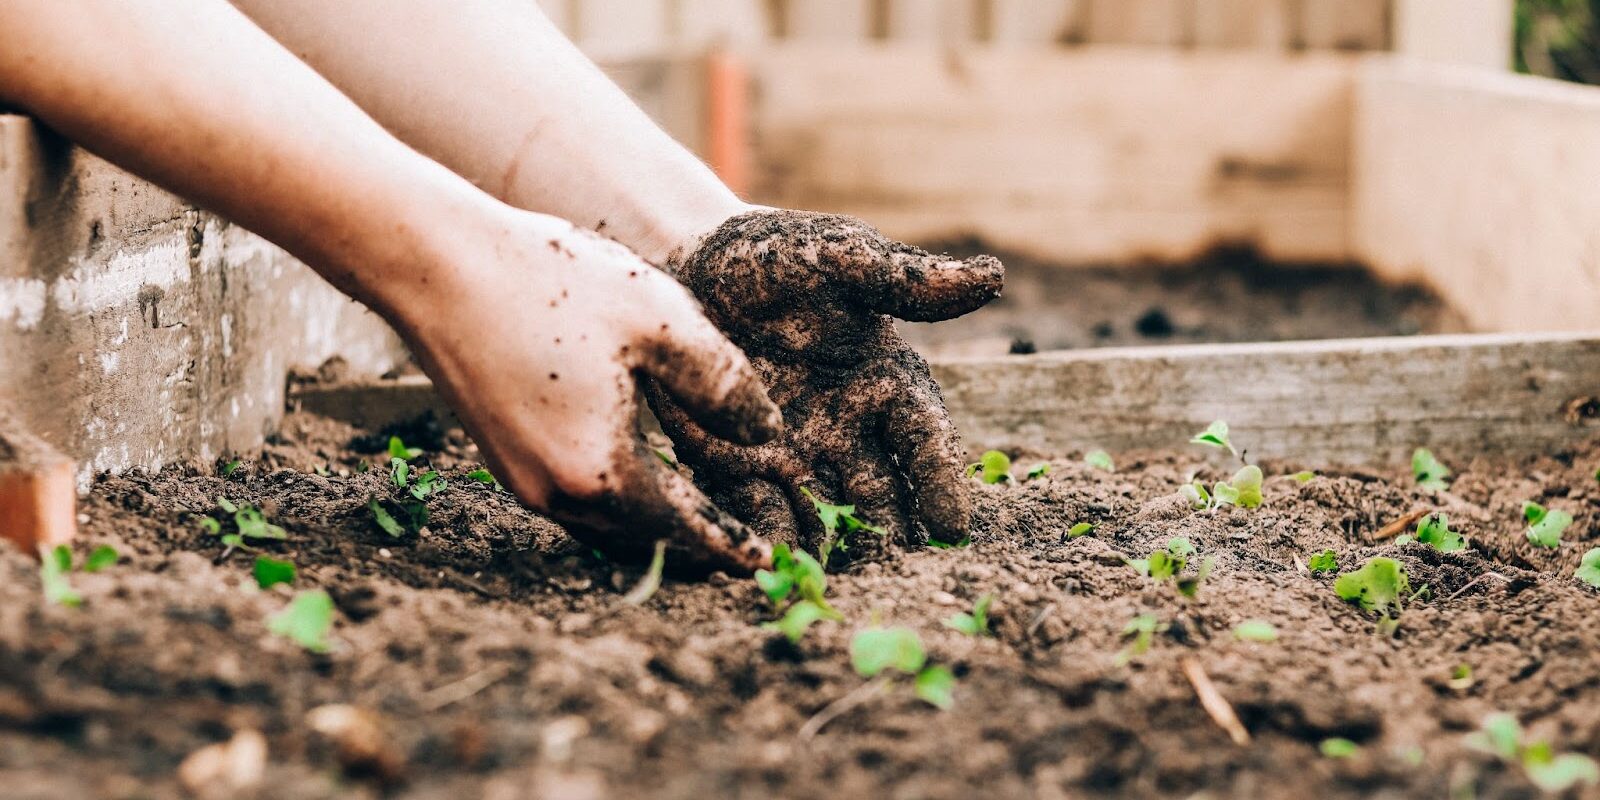
Soil Testing To Prepare Your Spring Garden
March 31, 2022
admin
Soil Testing To Prepare Your Spring Garden
Soil testing might sound intimidating, but the better you know your soil, the better you can grow your garden! Ready to break down the basics of soil testing and how it can help you achieve your garden goals?
We sat down with True Organic’s awesome R&D Agronomist, Margaret McCoy, PhD, for the inside scoop (or should we say—shovel) on soil testing and why it’s a vital step for a vibrant home garden.
TRUE: So what is soil testing? What does it tell us?
Margaret McCoy: “Soil testing will give you a baseline idea of what’s going on in your soil and how it relates to what you want to grow. You’ll take a composite sample of your soil — whether that’s a field, a raised bed, your yard — and test it for physical and chemical properties, like pH and nutrient makeup.”
Margaret told us some good things to look for in your soil test results:
- A healthy profile of macronutrients: nitrogen (N), phosphorous (P), and potassium (K)
- Good calcium levels (which helps with cell structure and integrity)
- And pH. “pH is really important but a ‘good’ pH is dependent on what you’re growing,” Margaret reminds us!
And some not-so-great things:
- Heavy metals
- High sodium levels
- Other general chemicals that may have leached into soil from industrial areas, lawn care, former agriculture on that land, etc.
TRUE: Why is soil testing important for a home gardener?
MM: “For a homeowner, you want to understand the properties of the soil you have, because you can’t really change your piece of land.
Getting a picture of what’s in your soil will give you a better understanding of how and where to grow the plants you want to grow. If it’s been a yard for 25 years, it might have an excess or deficiency of certain nutrients that you’ll need for the plants you want to grow. Maybe you’re bringing topsoil in, and you want to know exactly what’s in that — because whatever is in your soil will transfer to your plants!
It’s especially important to know what’s in the soil if you live in a subdivisions or developed lot, where there could be little to no topsoil — so your nutrients may be really low, because it’s a subsoil.
Beyond the basics, it’s also important if you think it’s a safety concern. Maybe at some point in the past, there was agricultural activity on that land and now there are chemicals in the soil that you don’t want in your garden.
 How To Do A Soil Test
The simplest way to get a comprehensive soil test is to find a kit online or at your local garden and home improvement store, which will have instructions and a special package in which you’ll send your soil to a lab. You’ll take some samples with a trowel from around your growing space, mix those together, and send it off to be tested.
“A home gardener is probably only interested in the top six inches of soil,” Margaret recommends. “Take a few samples from the various spaces that you want to grow in.”
And what about those results?
“You’ll likely just see a bunch of numbers and not know what it means!” says Margaret.
Find a local Master Gardener, Margaret suggests, to help you understand the results of your soil test and how to address them for your needs. Both NC State and Penn State Extension have great resources on this.
What’s In A Soil Test?
We asked Margaret for some more notes about soil test discoveries and what they mean.
 Soil Profile
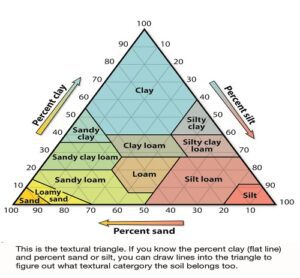
A soil texture test will show you how much sand, silt, and clay are in your soil. These inorganic particles are a highly influential aspect (along with organic matter) of the soil texture and structure.
Margaret gave us a less scientific but fun and kid-friendly test to do at home: “You can even do a jar test to see the different parts of your soil. Put some soil in a jar and shake it up so it becomes suspended (the particles will disperse throughout the water). You’ll see the particles fall out of suspension over time, biggest first. The really small clay particles could take days to settle out from the solution.”
“Even if you have a nice loamy soil on top, but underneath there’s clay, water will pool on top of the clay layer. With water sitting there, you’ll get water-logged plants.”
Unfortunately, there’s not a whole lot you can do about your piece of land’s soil texture. “In that instance,” Margaret says, “you may decide to grow in raised beds instead. That way, you can mitigate that overall heartbreak at the end when you realize none of your plants are surviving, which might not be your fault!”
 Soil pH
Any gardener knows how important soil pH is to growing veggies. Margaret’s first word of advice for dealing with low pH soil? Go with it! If you already have low pH soil, lean toward growing plants that like it.
Many lovely landscaping plants grow very well in low pH soil, including rhododendron and azaleas, holly, and flowering trees like magnolia and dogwood. Most vegetables thrive in neutral pH soil, but you can try potatoes, radishes, peppers, and pumpkin in more acidic soil.
The next step to addressing your garden’s soil pH is to use supplements. “Something like prilled sulfur is a fast-acting option to lower pH,” Margaret says. “You can also spread some lime on your soil to raise it, which takes a bit more time.”
As always, research your plant’s needs before planting, ask questions at your local nursery, or consult an almanac.
Organic Matter & Nutrients In Soil
Increasing the organic matter and good-for-plants nutrients in soil is something we at True Organic take seriously. The organic movement in the United States was founded with the vision of increasing the carbon in our agricultural lands!
Organic matter content is an invaluable aspect of soil’s overall health, especially when it comes to water retention and supporting the essential microorganisms that live in soil and help plants thrive.
“Organic matter is so important when it comes to drainage, “Margaret says. “Having good water-holding capacity in soil is equivalent to pore space — how much space there is between the particles to actually hold water. If you have a really tightly packed soil, you’re not going to have a lot of space, so it’ll either pond on top or you won’t have a lot of movement.”
If your soil test is deficient in organic matter and/or the macro/micro nutrients that are essential for plant life (the most important being nitrogen, phosphorus, and potassium), never fear. Adding high-quality composted materials to your land for organic matter and using organic fertilizers is the best way to start increasing these vital ingredients of healthy soil. We crafted our TRUE farm-grade organic plant foods just for this reason.
“Do I Need to Soil Test My Home Garden?”
Sometimes gardening is just a stress reliever, and you’re less concerned with optimizing your yield or you’re not growing food that will end up on your table. And to you, Margaret says: have fun! Don’t worry too much about the extra-technical aspects of garden and soil unless that helps you have fun and feel good about growing plants. Because that’s the whole point, right? To grow plants and feel good about it.

Show us your True Organic Plants
#GrowWithTrue
www.trueorganic.earth
Growing Herbs Indoors The Right Way
March 30, 2022
admin
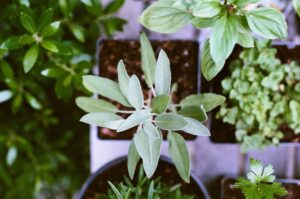
Growing Herbs Indoors The Right Way
The best way to infuse your cooking with the flavor of fresh-picked herbs all year round? Grow your own!
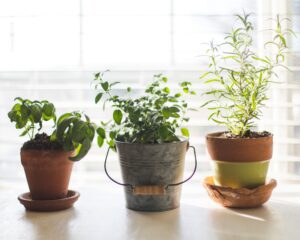
If you’re already caring for houseplants, adding an herb container garden to your indoor plant habitat is a breeze.
Growing herbs indoors is simple and straightforward if you follow a few basic tips. And lucky you, we’re here to dish out all the guidelines — to make sure you’re dishing out zesty flavors, whatever the season.
Best Herbs To Grow Indoors
So many types of herbs are wonderful for indoor container growing. Here are our favorites:
- Basil
- Oregano
- Lemongrass
- Parsley
- Mint (especially spearmint and peppermint)
- Rosemary
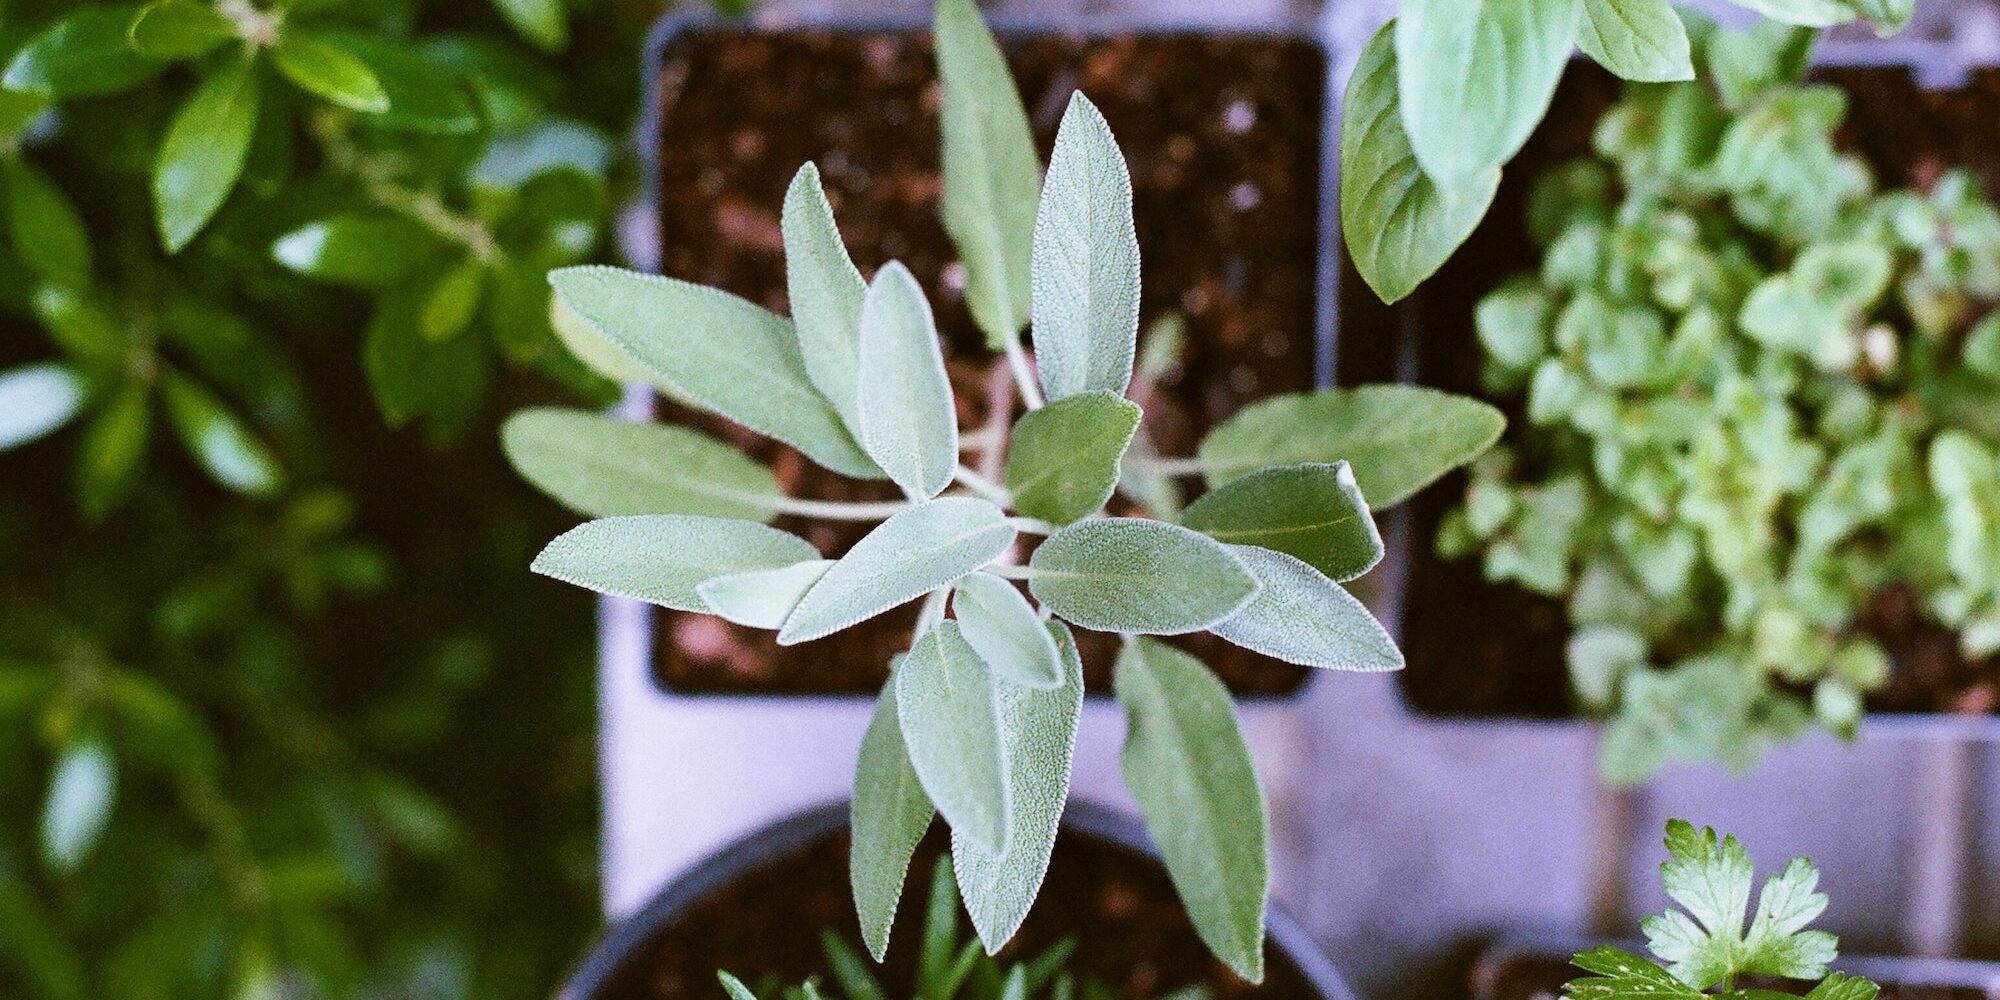
- Sage
- Thyme
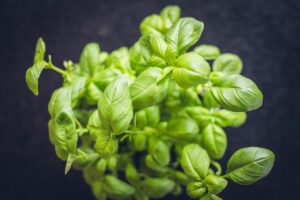 Tips For Growing Basil Indoors
Let’s talk about everyone’s favorite: basil. If you’ve tried to grow basil indoors, you might have lost a basil plant or two, likely to insufficient sunlight or poor drainage.
This versatile addition to pasta and salads, with its vivid color and delightful fragrance, can be harder to grow inside than outside. It needs a lot of sunlight!
Basil needs a lot of bright light: at least 6 hours a day minimum. Place it in a sunny location or 6 – 10 inches under grow lights for up to 12 hours a day. Be sure to protect basil from cold-snaps and breezes; it’s very sensitive to cold.
Basil likes to be warmer than other herbs (around 70 – 75 degree Fahrenheit is its preference), so you might need to place your indoor basil plant(s) somewhere toastier than your other herbs.
There are dozens of varieties of basil, some spicy, some sweet, some neon green and some-dark hued. That’s one of the joys of growing basil — choose a variety with a color that you love and a scent that fills your kitchen with joy!
 How To Grow Herbs Indoors
Just like any of your indoor green friends, there are a few basic categories of care that you need to pay attention to when growing herbs indoors:
Light
Most herbs need a lot of light. That’s why locating indoors herbariums or container herbs in a windowsill is popular. Just be careful of cold, drafty windows in the winter!
A South-facing window or room is ideal. Choose a location that gets sunlight for 8–10 hours a day, ideally, and at least some direct light.
Of course, in certain places, that can be impossible during the winter! If you live in a low light environment, like a forested area or a Northern latitude, you may want to invest in a grow light for your herbs.
Air Circulation
Good air circulation is one of the most overlooked aspects of indoor plant care. They need good airflow, but don’t want to face strong breezes, either.
Place your herbs somewhere that gets good airflow but isn’t drafty. In winter, this can be challenging, when all your windows are closed and insulated. Place a small fan near, but not too near, your herbs if you’re growing them close together or your home is particularly stuffy. If you have a ceiling fan in a large room with a window, this would also be a good option for sunlight and airflow needs for the plants. Just make sure they’re not getting a direct hit of wind from the fan.
Temperature
Most herbs enjoy a room that is around 65–70 degrees Fahrenheit during the day. Be careful if you live in a cold climate and you turn the heat completely off at night or when you go on vacation in the winter.
Some more hardy herbs, like oregano, thyme, and sage, are fine below 45 degrees, but many herbs will suffer — especially basil, which won’t survive for long below 55 degrees.
Keep herbs, like other leafy housemates, away from radiators, heaters, fireplaces, and heat vents. Their foliage can get dried out or even singed from the heat, and the soil will become too dry too quickly.
Humidity
Just like all other houseplants, indoor herbs need good relative humidity. In winter, soil can dry out quickly, and the inverse can happen in summer. Humidity is closely related to both air temperature and air circulation— so once you set your herbs up in a spot where those two are taken care of, healthy humidity should follow.
Caring For Indoor Herbs
 Containers and Planting
Most any moderately, small-sized and well-draining container will be a wonderful home for herbs. You can certainly bring an outdoor container-planted herb plant indoors during the winter! This is a common practice when growing basil because of its sensitivity to cold.
Choose a container for your herbs that is just a bit bigger than your herb’s footprint to allow for room to grow.
A windowsill box or hanging window planter (some of which attach right to the glass, if your window doesn’t have a screen), is a great place for herbs to thrive. They’ll get tons of light, but be careful if the outside air gets very cold. Herbs might be unhappy in the winter if outside air falls below freezing often. For this reason, it’s helpful to have a moveable window box for your herbs if you live in a climate with drastic seasonal changes.
Grouping Herbs
Herbs grow well together; grouping them in the same container can help them stay warm and support good soil drainage. Just be sure that all the herbs you’re planting together require the same watering and light schedule. Research at your local garden store or on your newly purchased plant’s tag or seed package label.
Be aware that some herbs, like basil and parsley, grow quickly and stems can get long and unruly. Luckily, you’ll be using them regularly in your cooking, so pruning won’t take a second thought!
Watering & Drainage
It’s much more common to overwater herbs than under-water them.
A plant mister is an excellent investment for growing indoor herbs. Since their containers can be smaller than other houseplants’, misting herbs rather than watering with a watering can help you avoid accidentally overwatering them.
It’s particularly important that your herbs’ soil is draining well. If soil starts to feel damp all the time, looks greenish, or if bugs start to gather, then repot herbs into a better-draining container. A swarm of gnats around your herbs is a sure sign that you’re either over-watering, or the soil is not draining properly.
Fertilizing Indoor Herbs
You can use a preplant starter, then plant food made for veggies or an all purpose food for your herbs. Fertilize them when they’re growing, during spring and summer. Most herbs are delighted with one feeding every other week, although many can go longer between applications.

Why Grow Indoor Herbs?
Like any other food crop, it can seem like more trouble than it’s worth to grow herbs for culinary purposes. But after you begin, you’ll see how beneficial it is to tend to your own indoor herbs garden.
Growing your own herbs rather than buying them saves money, gives you the opportunity to get creative with new recipes, make fresh teas or broths, and fills your home with the scent of a sunny summer garden.
Plus, the beautiful visual variety of herbs’ foliage is a gift for eyes that ache for greenery in colder winter months. The dark browns of chocolate mint, royal hues of purple basil, and grey-green of sage paint a beautiful plant-scape. Springy chive spikes and texturized mint leaves will begin to give you the same joy as a blooming succulent or a trailing pothos.
Enjoy the smell, view, and flavor!
Show us your True Organic Plants
#GrowWithTrue
www.trueorganic.earth

How To Store Your Garden Crops Without Canning
March 30, 2022
admin
How To Store Your Garden Crops Without Canning
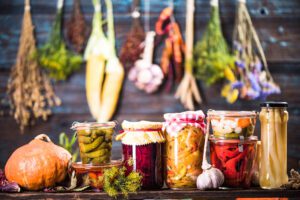
If you’ve ever asked a friend, “What should I do with all these tomatoes?” while harvesting your summer garden, you’ve probably heard a resounding: “Can ‘em!”
But what if you don’t have the equipment, expertise, time, or counter space to make 20 cans of tomato sauce that sit in your pantry all year?
Great news: It’s absolutely possible to store your garden crops without the hassle of canning. In fact, there is a whole menu of options besides traditional canning that you can utilize to preserve fresh fruits, vegetables, herbs, and even flowers.
Let’s get one thing straight: we’re not anti-canning! It’s true that canning is a time-tested, high-volume, economical saving method, and it’s a fun annual activity for those who have the time. But it can also be expensive, complicated, and time-consuming. Just to begin canning, you need a whole swath of equipment and a heck of a lot of kitchen counter space.
We’re here to help with alternatives to canning that will keep your garden harvest ready-to-use in any season.
Get ready for tomato sauce in Fall, the spice of peppers in the cold of Winter, and recipe ingredients at your fingertips year-round!
We’ll go over the best vegetables for winter storage, easy ways to store crops long-term and short-term, and fun ways to preserve your harvest for winter for delicious meals even when your garden isn’t growing.
How To Preserve Your Harvest
 Freezing
Don’t turn a cold shoulder to freezing your fresh garden produce! When done right, freezing preserves flavor and nutrients, and can majorly up your cooking game.
Tomatoes
While many people chop and cook down tomatoes for canning, you can freeze them whole! When you need tomatoes for a sauce, curry, or casserole recipe, you simply place them in a bowl of warm water and peel the skin off before adding them in. Another option is to freeze the tomatoes with the skin and then make sauce with them in the year when you have more time and aren’t overwhelmed by the garden’s bounty.
If you have a bit more time to invest during harvest, cut tomatoes into chunks to store. Yes, you can even cook your favorite tomato sauce for freezing.
Cooked Onions
Unprocessed onions don’t freeze well in their entirety (that’s why they’re best stored in a root cellar…keep reading!), but prepping a versatile onion recipe for freezing is a great idea for your year-round cooking.
One of our frozen-for-later favorites is caramelized onions — they freeze wonderfully and thaw easily, making any meal a gourmet event.
Check out Food Network’s quick and easy step-by-step guide on how to caramelize onions.
 Crushed, Chopped, or Roasted Garlic
Just like onion, you probably don’t want to freeze garlic whole and unprocessed. (They’ll be a bit mushy and hard to chop when thawed.) But it’s a fantastic freezer-kept harvest item with just a little prep.
You’ve probably seen frozen cubes or crushed or minced garlic at the supermarket. It’s incredibly easy to create your own! Or roast a few heads, mash them up, and store in small airtight containers or an ice cube tray.
Herbs
Cut herbs finely, add some oil, and store them in small containers or ice cube trays. Like minced, frozen garlic, all you have to do is pop out an “herb cube” and toss it in a sauté or soup — et voila! Instant herb flavor at any time of the year.
Mirepoix
Prepping and freezing a stockpile of this flavor base is a home chef’s top trick! Mirepoix is that delectable combo of (traditionally) carrots, celery, and onions that make the very best soups, stews, casseroles, etcetera etcetera!
Chop and dice your desired ingredients, sauté (in butter, the French traditionalists would recommend), slow the mixture to cool, and freeze in small containers. When you’re ready to cook with your frozen mirepoix, simply place a container or two in the refrigerator overnight to thaw.
Tips For Freezing Your Harvest
Aside from power outages, freezer burn is one of the only risks to using freezing as your preservation method. It occurs most commonly on foods with a high water content…so most of your veggies and fruits are easy targets. While it’s not a food safety concern, it sure does mess with the flavor and texture of food.
Freezer burn happens when moisture from the food rises to the surface, leading the food to become dehydrated and forming ice crystals and discoloration on the food.
Here are some tips for freezing your crops like a pro:
- Cool food first. Putting hot items right into the freezer will cause an excess of moisture to collect inside containers, risking freezer burn.
- Turn down the temp. Keeping the freezer quite cold can help preserve the flavor and texture of your produce.
- Store in airtight containers. Less airflow = less chance of freezer burn.
- Don’t freeze forever. Most foods should only be frozen for up to 6 months. After that, they’ll begin to decrease in quality.
- Keep the freezer shut! The more often you open the freezer door, the more airflow can mess with your frozen foods, bringing moisture and temperature flux. That’s why, if you freeze a lot of your garden harvest (and have the space in a garage or basement), it may be worth investing in a chest freezer.

Dehydration or Drying
Although similar, dehydration and drying should be considered slightly different techniques.
Dehydration refers to the use of a food dehydrator or oven set to a low temperature to preserve food. Drying, on the other hand, means simple hanging (or in some cases, laying out on paper towels) crops to expel their moisture on their own time.
You should turn to the dehydrator for any foods that take more than 5-7 days to dry out naturally. If crops are still moist after a week of hang-drying, they can start to get moldy and rot.
Drying Herbs, Spices, and Flowers
Your best bets for drying are plants with little moisture content to them already, like herbs and flowers. Simply tie small bundles of cut herbs branches or flower stems together and hang them somewhere with good ventilation and a bit of sunlight. Avoid anywhere humid, which will create mold.
When herbs are dry, crush them up with your hands and fill reusable jars. You’re ready for a spicy year ahead!
Conjure a Southwestern atmosphere by stringing lines of chili peppers in your drying area. Be sure to keep these away from pets and kids.
Dehydrating Food Crops
Investing in a food dehydrator can be a major upgrade to your garden-to-table! A vast number of food crops can be dehydrated successfully, from apples and berries (toss those sweet snacks on cereal) to onions, chives, and hot peppers (spice up your meals!).\
Cellar Storage
Although your home probably doesn’t have a traditional root cellar, it certainly has somewhere cool, dry, and dark. Perhaps a corner of the basement or garage, or even a low shelf in your kitchen cupboard — we’ll call all of these “cellar storage” for simplicity’s sake.
Creating and utilizing a cellar-type storage system is a must for winter veggie storage — and some fruits, too. Be sure to choose a place that doesn’t see much sun and doesn’t gather moisture, both of which encourage ripening and/or rotting.
You’ll want to store your crops in well-ventilated areas and containers like wooden crates (they’re called apple crates for a reason!) or burlap sacks. Cardboard boxes work fine but cut some holes in the sides to help with airflow. Cardboard also retains moisture quite efficiently, so check on your storage area periodically for any soggy cardboard and switch out boxes.
Harvest fruits like apples and pears can be stored for a shorter period of time in root cellars than long-lasting winter favorites like beets, certain varieties of winter squash (acorn, butternut, etc.), potatoes, onions, and so many other root vegetables. Onions, garlic, and potatoes can last in a well-kept root cellar for up to 8 months!
Some plants don’t store well together because of the gasses they emit or their moisture content, so store each crop separately — apples with apples, potatoes with potatoes, and so one. This, along with ventilation, will help prevent rotting.
Best Vegetables For Winter Storage (And A Few Fruits, Too)
To set you on your way, we’ll leave you with a quick-and-dirty list of our favorite crops to store for winter (and spring!) cooking. Happy preserving!
Best crops for freezing:
- Tomatoes
- Cooked onion
- Garlic
- Herbs in oil
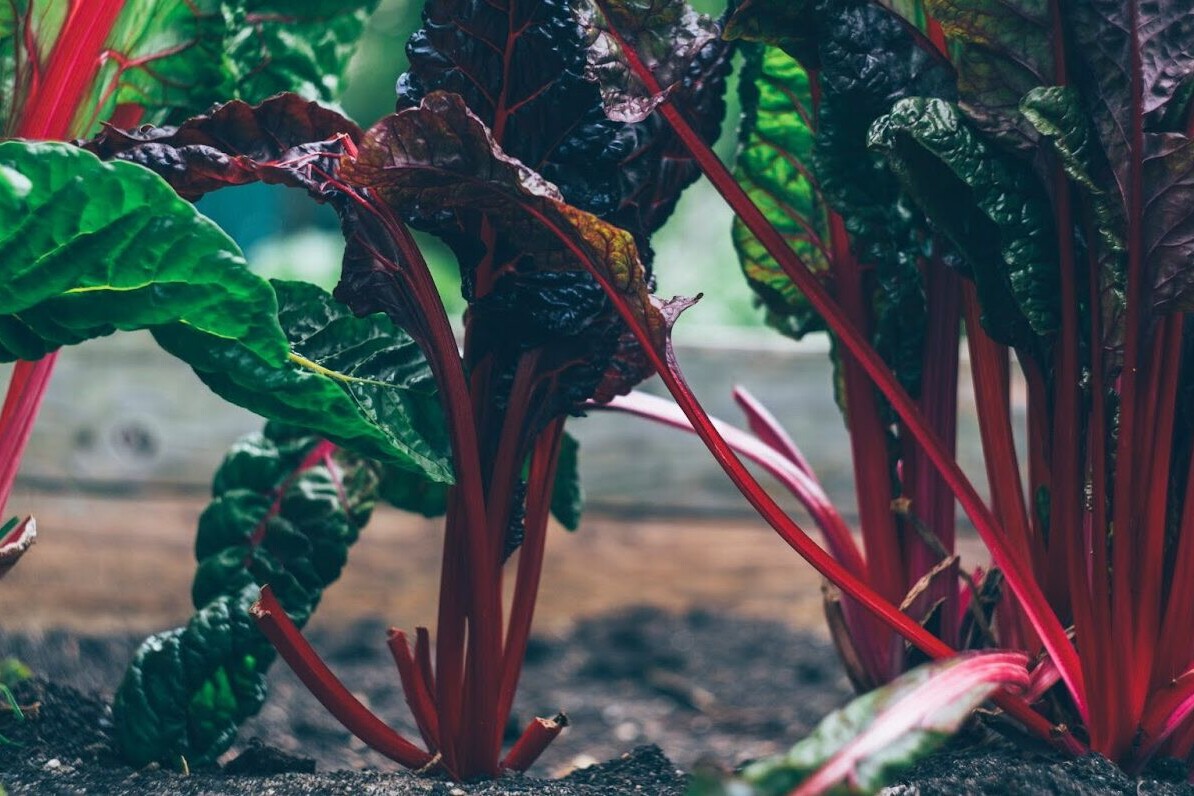
- Spinach, kale, and other greens (cooked or uncooked, should only be frozen for 1-2 months)
Best crops for cellar storage:
- Apples
- Pears (for a month or so)
- Potatoes
- Onions
- Garlic
- Shallots
- Turnips
- Winter squash
Best crops for dehydrating:
- Anything with high moisture content
- Stone fruits
- Apples
- Berries
- Herbs
- Onions
- Peppers
- Get creative!

Show us your True Organic Plants
#GrowWithTrue
www.trueorganic.earth
7 Unique Holiday Gift Ideas For Every Gardener
December 21, 2021
admin
7 Unique Holiday Gift Ideas For Every Gardener
They say it’s easiest to buy gifts for someone who has a hobby — and a gardening hobby may just be one of the most gift-able pastimes out there.
Holiday gifting season is upon us, but it doesn’t have to be stressful. Much like your gardening chores, gift-giving can be delightful when it’s infused with love, personality, and some time in the soil.
Gifting for gardeners is extra enjoyable because you know your gift is supporting habitat and soil regeneration…and potentially feeding you next harvest season!
For The Plot-Tender: Seeds
You can’t go wrong supplying your favorite gardeners with seeds for next year’s garden. What do they love to grow? What kind of flower might look lovely in their yard? What’s their favorite salad ingredient? Gifting seeds can become an immensely personal gift if you spend some time reflecting on your giftee’s dream garden.
Ordering organic seeds from an online catalog is the best choice for most people — unless you are shopping locally, in which case, a trip to your local garden store will be a fun gift-buying endeavor.
It’s incredibly important that seeds are always kept dry, out of direct sunlight, and in a cool place. Thus, mailing seeds yourself can be tricky.
It’s best to let the seed company do their expert shipping to be sure the seeds are preserved well. Or simply go with the gift of a seed store gift card and let your giftee choose their own seeds!
For The Homesteader: Folding Wheelbarrow
This recent invention is a truly brilliant garden up-level! Usually with a polyester-based fabric, a folding wheelbarrow reminds us of a cross between a hammock and a regular wheelbarrow. These light-weight tools save space, are easy to operate, and are incredibly cute!
For The Landscaper: Hose Storage
How many people really have an attractive hose storage system that brightens their garden? Let’s face it: most of us are making due with an old tire or the dull hose-hanger that came with our home.
Spice up your loved one’s home and garden with a high-quality hose house, ceramic hose bowl, or a shiny metal hose holder.
For The Heavy Harvester: Food Dehydrator
All those tomatoes! Endless berries! Plentiful peppers! What’s a better gift to a gardener than the gift of their harvest all year-round?
A food dehydrator is an unexpected gift for the gardeners whose vines, bushes, shrubs, and fruit trees overflow with abundant fruit and veggies. Accompanied by a food-drying recipe book, this could revolutionize your gardener’s home kitchen!
For The Chef: Canning Supplies
Much like a food dehydrator, the gift of canning equipment is another great gift for the gardener who grows bountiful crops. Canning can be a time-consuming, detail-oriented operation, so this gift is best for gardeners you’re close with — and ones you know will appreciate a new hobby.
Before you purchase a gift like this, you should do a little under-the-radar investigating to find out what kind of crops your gardener grows in abundance. Acidic and non-acidic foods are canned with different methods, either by water bath canning or pressure canning. The water bath method is the choice for acidic foods like tomatoes, salsa, fruits or pie fillings, jam, sauerkraut, and pickles. Pressure canning is used for low-acidity foods like meat, stock, carrots, and other high-pH veggies like potatoes, corn, green beans, soups, and peas.
Not sure which type of canning will fit best in your loved one’s life? Some mason jars, lids and rings, and a gift certificate for a local farm and feed store will always do the trick, too!
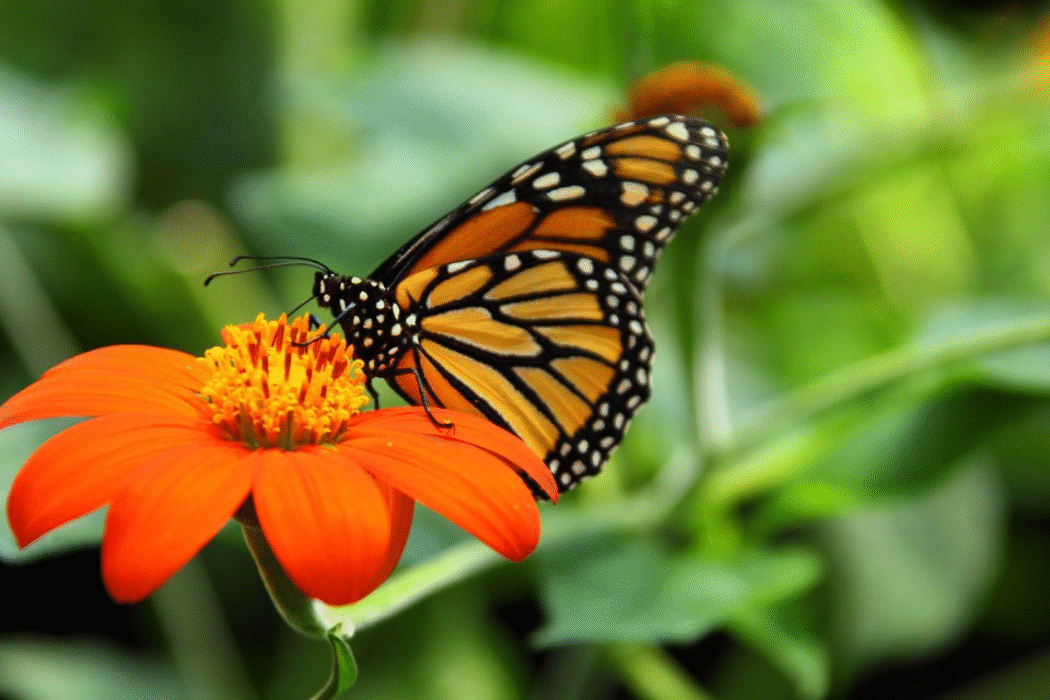
For The Wildlife Lover: Water Dish or Bird Bath
A “bird bath” in an urban habitat is so much more: it supports pollinators, other urban wildlife, and, yes, birds. Pollinators like butterflies and bees need drinkable water, too.
Water-holding dishes for gardens come in all shapes and designs nowadays — look around online and in your favorite local garden supply stores for standing, hanging, and low-to-the-ground water dishes.
Be sure that it’s made from sustainable materials (hopefully not a lot of plastics), is non-toxic (glass is great!), and suits your gardener’s needs. Does their yard or landscape have a tree that could house a hanging birdbath? What are their space restrictions? Might there be pets and kids running around that would make any glass or ceramic objects a hazard?
Not only does installing a bird bath nurture the ecosystem at large, it also makes landscaping a joyful place to sit and enjoy nature as bees buzz and birds play around the garden’s new centerpiece.
For Everyone: Organic Fertilizer
We’d be remiss if we didn’t mention that True Organic Plant Foods make incredible gifts for every type of plant-lover, from houseplant parents to raised bed farmers.
We recommend our All Purpose Plant Food for everyone (our Liquid All Purpose Plant Food is great for indoor gardeners) and our unique Liquid Bloom Boost for the flower lovers and fruit and veg growers in your family.
Happy gifting!

Show us your True Organic Plants
#GrowWithTrue
www.trueorganic.earth