
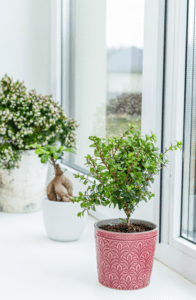
7 Common Houseplant Ailments & How to Fix Them
December 11, 2023
Chancy Lanier
7 Common Houseplant Ailments & How to Fix Them
Winter weather and long nights mean changes for humans, animals, and plants. Including our houseplants!
If you love your houseplants, seeing them covered in mildew, yellowing, infested with spider mites, or dropping leaves can be a huge bummer. And not knowing what’s wrong or how to help them can stress out any plant parent.
Luckily, understanding the signs of common houseplant issues just takes a bit of attention and treatment can be simple. Should you ditch a plant with root rot? Is powdery mildew a fungus? Let’s look at a few common problems with houseplant health and how to address them.
Preventing Houseplant Issues
Just like us, our plant companions need certain conditions and nutrients to stay healthy, and they succumb more easily to illness if those conditions aren’t met.
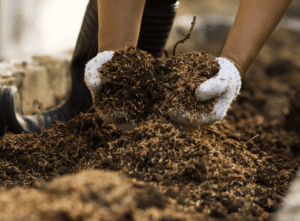
Plants can become “sick” for lots of reasons: caused by invasions by viruses, fungi, bacteria, and parasitic insects; from lack of nutrients; or because of generally unhealthy growing conditions. And while plant ailments are caused by different things, the best way to prevent and treat anything going on with your plant is to make sure you’re caring for them properly. Good overall health of a plant is the best prevention for any ailment.
Taking good care of your plants means:
- Not over-watering or under-watering
- Being sure plants are placed in a location with proper sunlight exposure, water drainage, and air circulation
- Keeping a plant’s environment at proper humidity level
- Giving plants proper nutrients from organic soil and fertilizer
- Cleaning and sanitizing garden tools (like shears, spades, and pots) between plants
- Making sure you buy disease-free plants so as not to infect your existing plants.
Heading into winter? Check out our guide to winterizing your houseplants.
What about fungicides?
We don’t recommend using chemical fungicides, not only because of how pricey they are, but because using those chemicals in your home can be harmful for you and your pets. There are plenty of ways to treat all of these conditions with practices and ingredients that are completely safe for your family, plants, and the planet.
Fungal Diseases
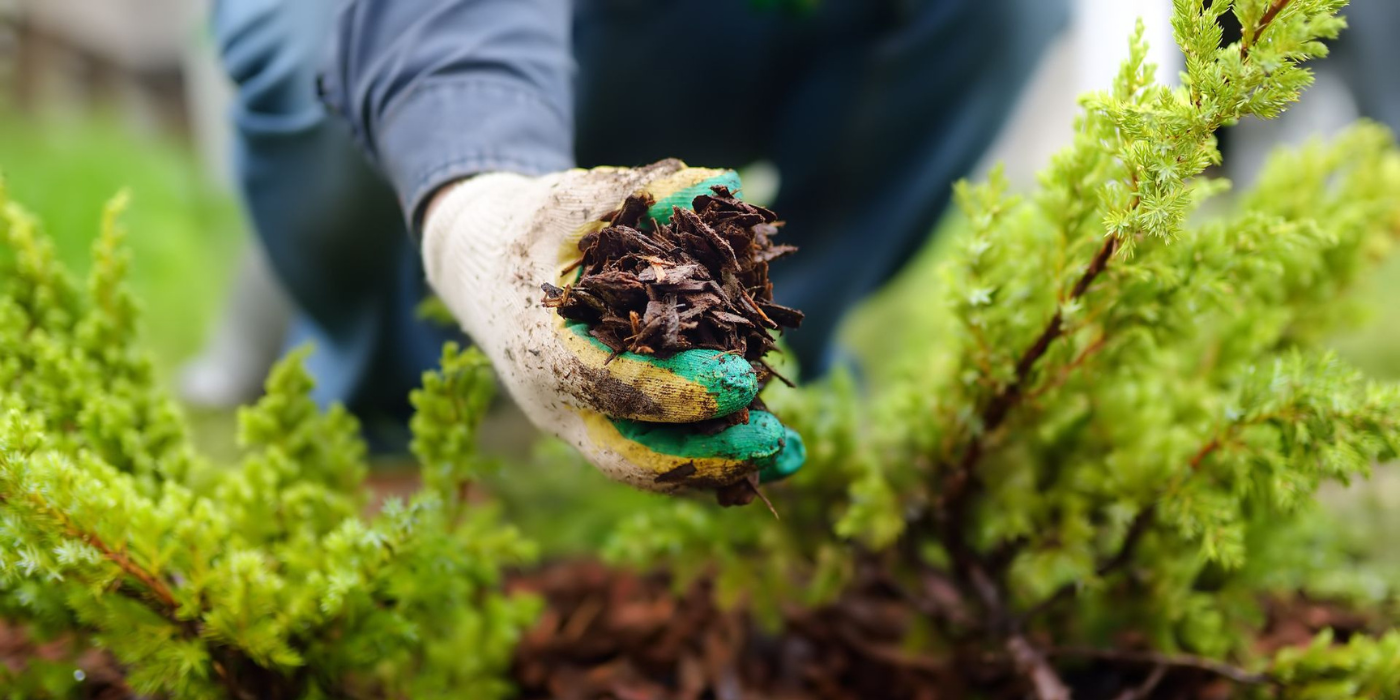
Root Rot
Root rot is a common plant ailment that can be caused by several different kinds of fungi. It typically results from overwatering. Excess water creates an environment conducive to fungal growth, which can lead to the roots deteriorating.
Signs of root rot include yellowing leaves, wilting, and stunted growth. You might also notice a foul smell or black, mushy roots when you remove the plant from its pot.
Stems and leaves may also show wilting and softness due to these same fungal infections, which is why root rot and stem rot can go hand-in-hand.
How to fix it: Don’t overwater; if your plants are sitting in water, that’s a fast road to root rot. If only a few roots are infected, you can cut them out and repot the plant in sterile soil. Always use sterilized soil and pots so you don’t spread disease between plants.
Powdery Mildew
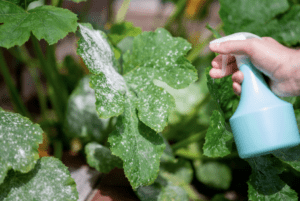
Powdery mildew is a common fungal disease that affects pretty much every kind of plant. It appears as a white or grey powdery substance on the leaves and stems. It often occurs in conditions of high humidity and poor air circulation. Besides its unsightly appearance, powdery mildew can weaken plants and stunt their growth.
There are several kinds of fungus that cause powdery mildew but they all typically come from fungi living in dead plant material or from airborne spores that might come from outside.
How to fix it: Clip off the affected leaves. Since powdery mildew thrive in humid conditions, move your plants to a place with better ventilation or otherwise decrease the humidity in some other way. Make sure you’re not overwatering. You can use a sulfur spray to help reduce powdery mildew from spreading.
Anthracnose
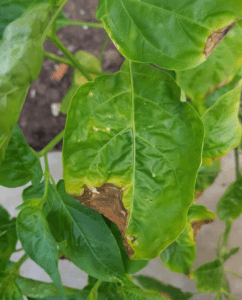 Like powdery mildew, a fungus causes anthracnose. It makes leaves turn yellow and tan at the tips, then dark brown around the tip and whole leaf, before eventually dying. It can be introduced if a plant is wounded (perhaps by a swatting cat?).
How to fix it: Snip off and destroy infected leaves. A gentle spray of soap water can help reduce future powdery mildew infection.
Environmental Conditions
Oedema
Oedema starts showing with rough corky swellings on leaves and petioles (the part of the plant that connects leaf to stem). After that, leaves may turn yellow and eventually droop and fall off. These swelling are actually caused by too much moisture, getting trapped in the plant.
So, as you can imagine, over-watering and poor lighting with low temperatures predispose plants to oedema. This happens commonly and unsurprisingly in succulents.
How to fix it: Leaves showing symptoms of oedema will sadly not recover, but you can halt the plant’s decline by improving light and watering habits. Repotting to improve soil drainage may also help severe cases.
Leaf Drop, Yellow, & Wilting
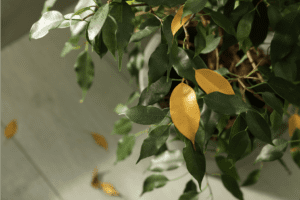
General plant malaise, especially wilting and yellowing, is usually an environmental or care-taking issue.
Wilting: Wilting is most likely…you guess it: inadequate or excess water. It can also mean a nutrient overload or that a plant’s pot is too small for it. Roots likely aren’t getting enough oxygen, so you need to provide drainage, reduce watering, and be sure your plant’s roots have room. Don’t fertilize it until it’s healthy.
Shock from significant change in environment can also cause wilting.
Yellowing: Yellowing all over is another sign of general illness, perhaps caused by overwatering, parasites, or lack of light. Check for drainage and root rot, re-pot if necessary. Be sure to give your plant enough sunlight.
Bud drop: If your plant loses flower buds prematurely, it may need a dose of fertilizer, especially nitrogen.
Pests
Spider Mites
These tiny pests can cause significant damage. As they eat plant sap, yellow spots or stippling appears on leaves. Some leaves may even fall off. Spider mites thrive in dry, dusty conditions, so keeping your plant’s environment clean and adequately humid can help deter them. Treat infestations by washing the plant with soapy water and using a miticide if necessary.
How to fix it: Treat infestations by washing the plant with soapy water and using a miticide if necessary. The best way to treat an infestation is to nip it in the bud, so inspect plants frequently, looking for white or yellow spots (which are easiest to see with a magnifying glass or hand lens). Consider covering the infested plants with bags as you treat them, to avoid the infestation spreading to adjacent plants.
Aphids
 Aphids are less often seen on houseplants than on food crops, especially leafy greens, but they certainly can infest houseplants — and they sure are a pain in the butt. They may be red, brown, yellow, or black.
Aphids don’t only destroy your plants by sucking their sap, they also exude a sweet substance that attracts other pests and build up gunk on a plant’s surface that will prevent light from being absorbed. Bad news all around!
How to fix it: Small colonies of aphids are easy enough to pick off and crush. If squishing doesn’t work for you, drop them in a container of soapy water and dispose. If your infestation is growing, spray off with a stream of water and check on the overall health of your plant. Or, if you’re struggling with aphids in your outdoor garden, try introducing beneficial pest-eating insects like ladybugs or lacewings by placing pollinator plants in your garden, which attract friendly bugs.
Caring for Houseplants = Caring for You!
Indoor plants bring us joy, fresh air, and beauty. It’s not surprising that there’s increasing scientific research backing up what so many of us plant-lovers already know: being around green friends is healthy for us — in all kinds of ways. Taking care of plants just feels good.
Yes, you can keep houseplants alive! Go you!
The best way to protect your houseplants from illnesses and parasites is to give them plenty of attention and thoughtful care. Rich soil and organic nutrients, just the right amount of water, and balanced humidity and airflow. Just like you’d take care of yourself or a loved one: let the process of taking care of your houseplants encourage you to slow down and enjoy the joy they bring to your life and home.
(And don’t over-water!)

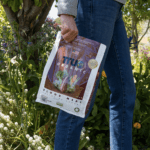
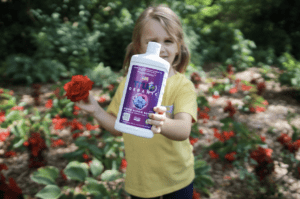
Show us your True Organic Plants
#GrowWithTrue

www.trueorganic.earth
10 Unique Seed Varieties We Can’t Wait To Grow in 2024
November 22, 2023
Chancy Lanier
10 Unique Seed Varieties We Can’t Wait To Grow in 2024
Thinking about 2024 garden planting? So are we! Now is the time to sit down with your garden journal and plan your fabulous 2024 growing season.
Why not add some new varietals amongst your traditional heirlooms and perennials?
Here are some of our favorite new and noteworthy plants that are cropping up this year. Growers, researchers, and seed breeders are always developing new seeds for flavor, sustainability, nutrient makeup, and appearance, and we’re always interested in trying the up-and-coming varietals.
Check our 10 most anticipated seeds for 2024!
1) Harvest Moon Tomato
 A USDA Certified Organic varietal bred by Emily Rose Haga for Johnny’s Seeds, these stunningly patterned tomatoes are almost too pretty to eat. Almost. Their firmness and consistent 7-10 oz. size makes them perfect for gardener-cooks who love to have tomatoes for summer salads, sandwiches, and salsa. Their sunset-colored flesh and skin adds beauty to any garden and flavor to any table.
This is an indeterminate varietal, meaning they need some structure (caging or staking), yet their compact size is perfect for any sized plot. With fewer defects or oversized fruits than heirloom varieties, the Harvest Moon does well in baskets and containers, too.
2) Filderkraut Cabbage
 These huge, lovely cabbages boast a fun pointy shape and lovely gradient coloring that’s almost as fun to look at as it is to eat! Originating from Southern Germany’s Filder plateau, this crop was developed in the 1700s.
A rare selection, this crop is included in Slow Food’s Ark of Taste — an evolving catalog of unique heritage crops facing extinction.
While prized for its visual appeal, Filderkraut cabbage also offers a pleasant flavor. It is often used in a variety of culinary applications, such as sauerkraut, coleslaw, or as a unique ingredient in salads and side dishes.
3) Sweet Garleek
 Allium lovers, we have big news. This brand new invention just hit the shelves! Besides winning TIME’s Best Inventions of 2023, sweet garleek is a tender allium that offers both savory and sweet taste of garlic and leek. You get everything you love about each—in one deliciously versatile vegetable. The result of 10 years of selective breeding and testing, the Sweet Garleek intensifies the sweetness of the leek and the rich, savory taste of garlic (without the aggressive pungence).
It’s perfect for sautées or yummy on a salad, sliced thin or grated raw.
4) Blackberry Potatoes
 Check out that color! Awesome for making chips or roasts. These deep purple potatoes have strong purple stems and white flowers. Johnny’s seeds calls them “easy to grow” and notes resistance to intermediate resistance to potato scab disease and some resistance to Colorado potato beetles. Developed by Michigan State University and USDA Certified Organic.
Blackberry potatoes have great flavor and a nice, creamy texture perfect for baking, grilling or mashing.
5) Japanese Tiger Melon
 This snazzy, striped cucurbit is cute, zesty, and perfect for small gardens. Less than a pound each, these grow in typical melon vines and are commonly loved in Japan for their flavor and texture in desserts, salad, and more.
In Japan, these melons are sometimes given as gifts, especially during special occasions or as a gesture of goodwill. The unique appearance and delightful taste make them a prized and thoughtful present.
6) Centercut Squash
 Another cucurbit! This lovely version of the heirloom tromboncino (or zucchetta) squash also has an interesting creation story. Its creation was funded in part by a USDA-NIFA grant and the sale of Centercut Squash seeds benefit public plant breeding research at Cornell University. It’s a winter squash that is treated like a summer squash and eaten when the fruits are young and tender, before the skin toughens up.
This vine produces cute green squash with a sweet, nutty flavor and meaty texture.
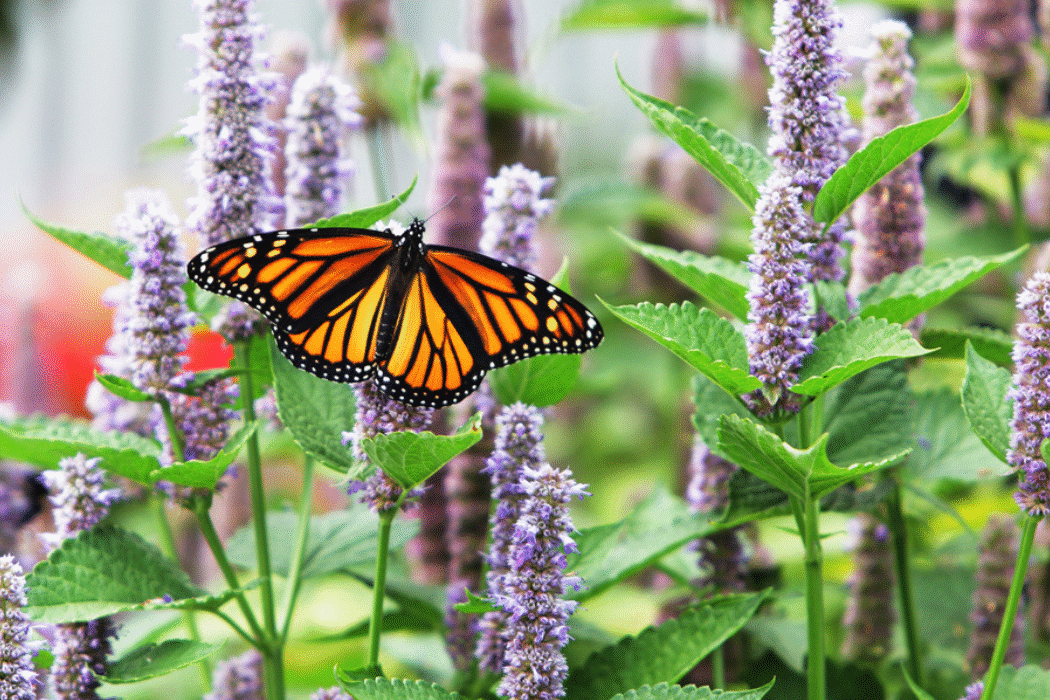
7) Anise Hyssop
 This perennial herb is one of the most useful in both pollinator gardens and herb gardens. It produces early spring blooms and is also great for border gardens.
A native to North America, Anise Hyssop’s fluffy, upright purple flowers will attract both pollinators and compliments for your garden. Native North American people used it in common medicine. It’s even suitable for growing as an edible microgreen.
A versatile perennial herb perfect for drying for teas, adding to baked goods, or tossing in a salad. Or just enjoying its lovely anise-like scent!
8) Park Seed’s 2024 Lawn Alternative Mix
 Okay, so this is multiple varieties, but we just love Park Seed’s annual lawn replacement seed mixes! This curated mix of low-maintenance, water-wise grass alternatives can transform a lawn into eco-friendly and attractive groundcover suitable for all regions.
One packet covers 500 square feet and contains 64% perennials! Inside, seeds of Baby Blue Eyes, Creeping Clover, Daisy, Poppy, Roman Chamomile, Sweet Alyssum, and so many more are waiting to become part of your new soil-supporting lawn!
9) Coral Candy Premium Sun Coleus
 Another Park Seed beauty, this All-America Selections (AAS) Ornamental Seed Winner is ready for its day in the sun. Its warm-toned, multicolor, draping foliage is dense as it is eye-catching. It’s perfect for hanging baskets and other container gardens, both indoors and outdoors.
It shows off its bright, striped colors from late spring through autumn. It’s a fast grower and sits in a nice uniform mound that looks great grouped together in ornamental or landscaped gardens. Park Seeds writes that “just 3 seeds are enough to amply fill a 14- to 16-inch container” and tends to be deer-proof!
10) Pink Basketflower
 We saved the best for last. These enormous, bright purple floppy flowers are part pompom and part sunburst! Super easy to grow and native, this annual is a powerful pollinator plant and will attract both birds and bugs. It can grow to 5 or 6 feet tall, so it’s a top choice for borders and buffer zones.
The deeply incised foliaged and pincushion blooms of basketflower are reminiscent of giant Bachelor’s Buttons, and this flower is a close relative.
Now that you’ve learned about our top picks, get ready to spice up your garden with innovation and color!

Show us your True Organic Plants
#GrowWithTrue
www.trueorganic.earth

Houseplants and Pets Living in Harmony
November 9, 2023
Chancy Lanier
Houseplants and Pets Living in Harmony
It’s a conundrum many an interior designer, veterinarian, and pet owner has faced: Can houseplants and pets coexist without destroying one another?
The answer? Absolutely, yes! It may take a little planning, some research, and perhaps a home decor adjustment, but these beloved companions can live harmoniously in any home.
Both houseplants and pets add so much to our home lives: companionship, beauty, and fun. Yet a curious cat or dog who loves to dig can mess up your curated plant collection pretty quickly. And just one accident with a plant that is toxic to animals can cause a trip to the vet, or worse.
Creating a pet-friendly environment doesn’t mean you have to give up on having houseplants. To understand which plants are pet-friendly and how to create a happy environment for all the inhabitants of your home, read on.
Certain Plants Can Be Toxic to Animals
First thing’s first: some plants should never be kept in a house with pets, period. Just like certain plants are poisonous to humans, there are plants that can be very dangerous for pets, if ingested. Be sure to research each plant before bringing it into a home with animals. Some can pose significant health risks and can even cause death.
Here are a few of the most common houseplants to ban from any household with a pet:
- Lilies: extremely toxic to cats
- Sago Palms: highly toxic to dogs
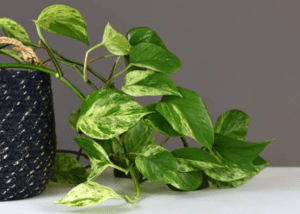
- Pothos: toxic to all pets
There are a lot of unreliable sources out there, so go with expert advice. For a full list of which plants are safe or unsafe for pets, read the ASPCA’s complete guide. And save ASPCA’s animal poison control hotline on your phone: (888) 426-4435.
Choose Pet-friendly Houseplants

There are plenty of plants that give you all the benefits of growing an indoor garden and are totally safe for pets.
A few favorite houseplants for pet-owners:
- Spider Plant: Perfectly safe for both dogs and cats, lovely, air-purifying, and a great propagation plant
- Boston Fern: Another pet-safe option that add humidity to the indoor environment
- Areca Palm (aka Butterfly Palm): Offers gorgeous lush foliage is pet-friendly
These are just a few! Check out Architectural Digest’s awesome list of pet-friendly houseplants and how to use them in your interior design.
Pet-proof Your Plants
After you’ve made sure to select plants that are safe to have in the house with pets, the next challenge becomes where to put them.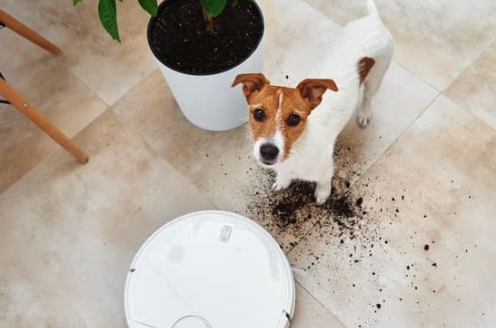
Puppies of all ages love to dig in potted plants so make sure on-the-ground pots are tall enough to deter dogs from getting messy.
Only you know your cat’s nature, but in our experience, you should never underestimate how much a playful cat will attempt to attack dangling plant foliage! Keep plants’ wiggly bits out of reach for curious claws and paws.
Plant stands seem like a great option to keep green friends away from furry friends, but they present a typing hazard when pets get zoomies! Here are a few options ideas to help pet-proof your indoor plants.
- Hanging pots and baskets
- Small containers that adhere to windows
- High shelves and cabinets — although never 100% cat-proof!
If your pet is persistent in trying to reach your plants, consider using pet-friendly deterrents like bitter apple spray or aluminum foil around the base of the plants. These methods can discourage pets from nibbling on your greenery.
Use Pet-Safe Potting Soil & Fertilizer
Always use products that are safe for plants, animals, and humans on your houseplants. That means potting mix, fertilizer or compost, pesticides, and fungicides.
Never use harsh chemical fertilizer, pesticide, or other additives on your houseplants when there are pets around. (In our opinion, you should be avoiding those types of products even without pets! Humans and plants shouldn’t be exposed to harsh chemicals, either.)
- If you have pesky bugs on your houseplants, try apply neem oil spraying foliage with warm soapy water rather than using a pesticide
- Use only organic, food-safe fertilizer like True Organic
- Use organic potting soil
- Be sure to store plant food and other gardening supplies properly somewhere that pets can’t access
Houseplant and pets can coexist! The first step is understanding your pet and researching your plants. By learning about which plants are pet-friendly, taking necessary precautions, and planning ahead, you can create a beautiful and safe environment for everyone in your home.


Show us your True Organic Plants
#GrowWithTrue
www.trueorganic.earth
5 Earth-friendly Ways to Use Halloween Pumpkin Guts
October 25, 2023
Chancy Lanier
5 Earth-friendly Ways to Use Halloween Pumpkin Guts
It’s pumpkin carving time! But what happens after pumpkins are carved, displayed, and start to rot?
Just like all other food “waste,” when pumpkins end up in a landfill, they generate greenhouse gasses that don’t belong in our atmosphere in excess. Not only that, their capacity to regenerate healthy soil is halted, because they’ve been removed from nature’s powerful decomposition cycle.
There are plenty of ways to make sure that doesn’t happen.
After Halloween is over and your Jack-o-lanterns get saggy, there are still ways to make sure that rich organic material doesn’t end up in a landfill. Read on to learn some clever ways of upcycling pumpkins of all varieties.
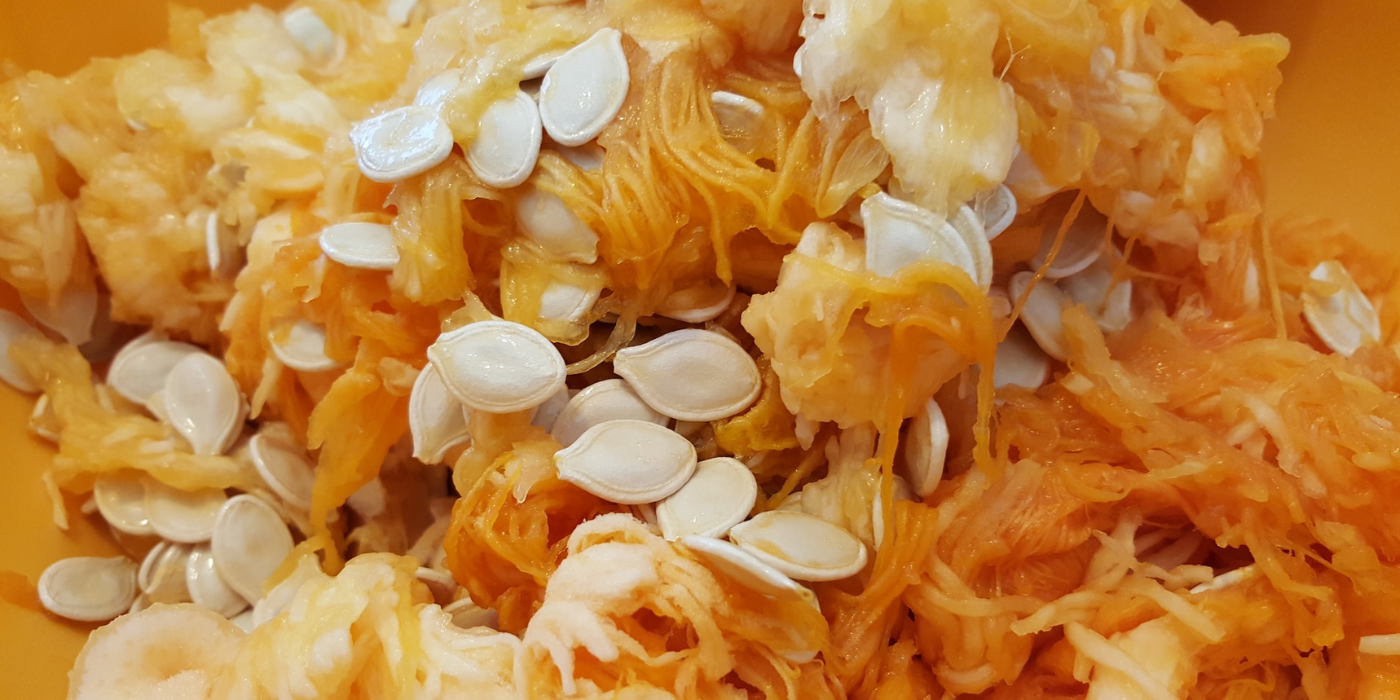
1. Roast The Seeds
This one’s a classic and kids love it! As you scoop your pumpkin for carving prep, set the “guts” aside in a bowl. Separate seeds from the pumpkin strings and gooey flesh and place the clean seeds on a cookie sheet. Let dry while you carve your pumpkins.
When seeds are dry, toss them in olive oil and spread them out on the baking sheet, spaced as evenly as possible. Sprinkle with salt and any other spices
Roast at 350 degrees for 40 minutes or until golden brown.
Here are a couple of our favorite roasted pumpkin seed recipes:
- Basic Pumpkin Seed Roasting Recipe from The New York Times
- Sweet & Salty Pumpkin Seed from Phyllis Grant at Food52
Roasted pumpkin seeds with just a little salt make a tasty treat, but you can also use the roasted seeds to make:
- A seed, fruit, and nut mix — try spicy or salty-sweet flavors
- Pumpkin seed pesto or hummus
- A crunchy topper for salads and soups
2. Make Pumpkin Stock
 Of course, you should only cook and eat clean, not-too-old pumpkins! Don’t go eating a saggy Jack-o-lantern that’s been sitting on your porch for two weeks.
But if your pumpkins are totally rot-free, haven’t been exposed to extreme temperatures, and uncarved, there are plenty of delicious ways to turn most parts of a pumpkin into food.
For stock: After carving or when you’re done displaying pumpkins, chuck the insides in a big stock pot. Add any other veggies or veggie scraps you may have, including onion, celery, garlic, and carrots. Cover with water and a bay leaf or two, and perhaps a little salt.
Simmer on the stove for several hours. Strain out veggies, pouring into a jar. Seal and refrigerator (use within 4-5 days) or freeze it for up to 5-6 months. Or use the stock right away for soup or risotto!
Homemade pumpkin puree can be used in recipes for breads, cookies, or muffins that call for canned pumpkin. It can be frozen and thawed for future use, too.
What kind of pumpkins are edible?
Good news: most pumpkins are edible. Even pumpkin types bred as common Jack-o-lanterns can be eaten — but these have been bred for visual apparel rather than taste and nutrition, so stick to baked goods when you cook those. Plenty of pumpkin varieties are grown specifically for eating, so choose those if you’re interested in making soup or a roast.
3. Save The Seeds for Planting

Save your seeds to grow your own pumpkins in your garden next year. Follow the steps above to remove and separate the pumpkin insides and seeds. Lay clean seeds on a tray and cover with a paper towel or light cotton rag.
Let seeds dry very well, keep them out of direct sunlight and away from dramatically varying temperatures.
Once seeds are dry, seal them in a plastic bag, envelope, or other sealable container and keep them in a cool, dry location protected from direct sunlight.
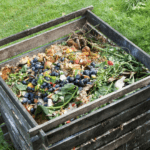
4. Compost
Home gardeners know the best way to keep your pumpkin out of a landfill is to use it to enrich your garden. If you have a high-functioning home compost operation, pumpkins are awesome additions to the pile.
A few tips for composting your Halloween pumpkin:
- Remove all candles, wax, or other non-organic materials
- Never compost painted pumpkins
- If you garden organically (and we hope you do!), be sure your pumpkin was grown on an organic farm
- Remove the seeds before composting — unless you want your compost pile to become your pumpkin patch next spring
- Chop the pumpkin(s) into chunks before you tossing in the compost heap so it will break down quicker
- Balance the big dose of organic material (or “green” material) with a carbon-rich (brown material) addition, like leaves, newspaper, or wood ash
- If you don’t have a home compost, there may be a local organization that will happily take it for compost or food for livestock.
Do a quick internet search for “donate old pumpkins near me” and you’ll probably be surprised. Plenty of farms, animal shelters, and non-profit orgs around the country collect used Halloween pumpkins.
5. Feed The Wildlife…Or Your Chickens!

Local wildlife would love to snack on your pumpkins! Even if your pumpkins are a little soggy, everyone from bluejays to deer will be happy for the nutritious late-fall meal.
We recommend only feeding organic pumpkins to wildlife, since harsh chemical fertilizers can be harmful to animals. Also, don’t feed painted pumpkins to animals.
Make a cute pumpkin bird feeder by cutting off the top half of the carved pumpkin, filling the bowl with bird seed, and hanging it from a tree or placing it on a fence. Get ready to admire migrating flocks as they take a break in your wildlife paradise.
For foraging four-legged animals like squirrels, rabbits, and deer who are preparing for a long winter, cut your pumpkins into chunks and scatter them at the edges of your yard. Avoid this if you have a rat problem!
If you’ve got chickens in the backyard, we don’t need to tell you how much your flock will love pumpkin remains.
Happy Halloween!


Show us your True Organic Plants
#GrowWithTrue
www.trueorganic.earth
How and Why to Use Blood Meal in Your Garden
October 16, 2023
Chancy Lanier
How and Why to Use Blood Meal in Your Garden
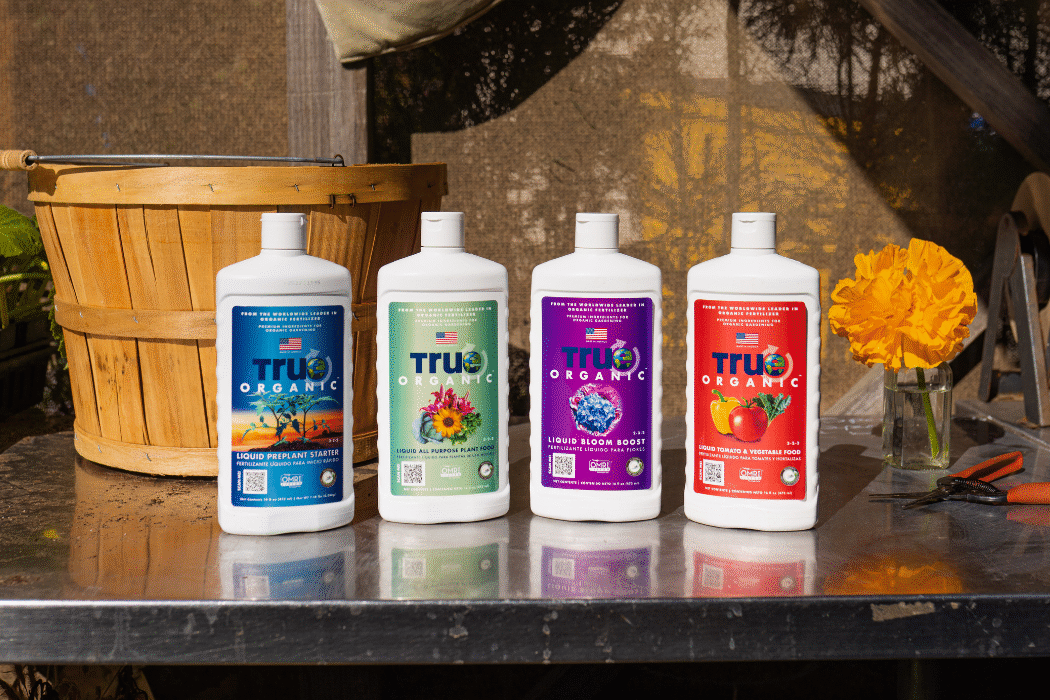
When it comes to maintaining a thriving garden, you might already be using traditional fertilizers like our All-Purpose Plant Food, blends created for specific gardening projects like our Annuals & Perennials Foods, or single-ingredients products like Prilled Sulfur. But have you tried using Blood Meal?
Spooky season is the perfect time to talk about this awesome supplement. It’s a sure-fire boost for all those fall crops and heavy feeders, and should be applied twice a year: once in spring and once in the fall.
Don’t be spooked! Blood Meal might sound a little creepy, but it’s a totally safe agricultural supplement — in fact, blood has been used for centuries as a fertilizing ingredient by gardeners and farmers all over the world.
Why use Blood Meal in your garden?
Blood Meal is a rich source of nitrogen and other nutrients that your plants need for happy growth. Nitrogen promotes vibrant green foliage, supports strong stem development, and aids in the production of chlorophyll. By incorporating blood meal into your garden soil, you can ensure that your plants receive this necessary element to thrive.
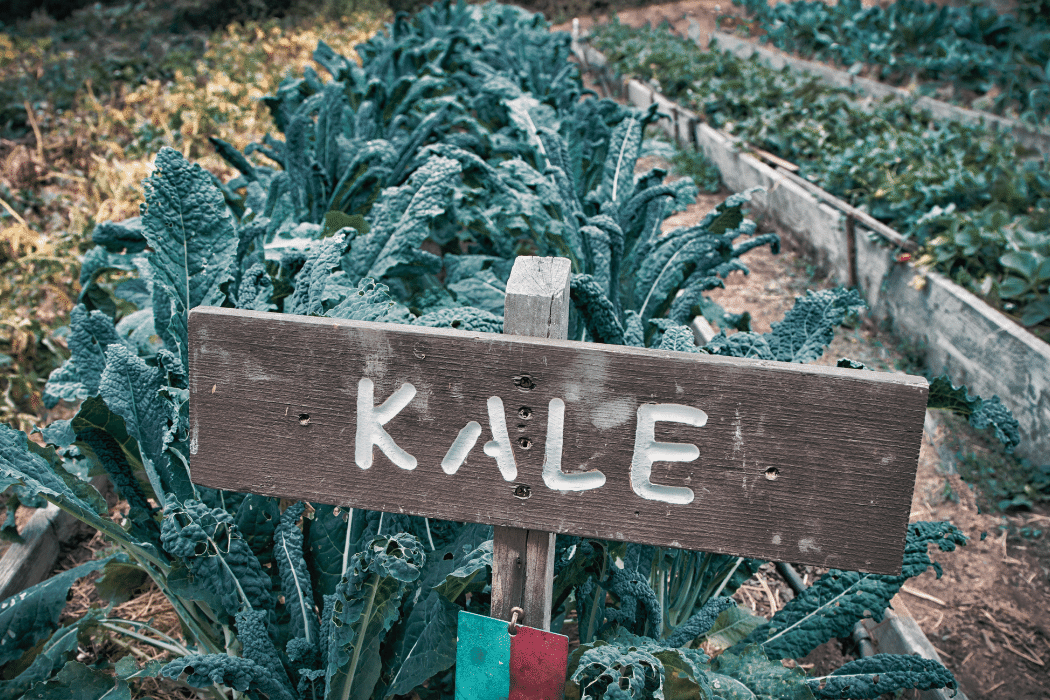
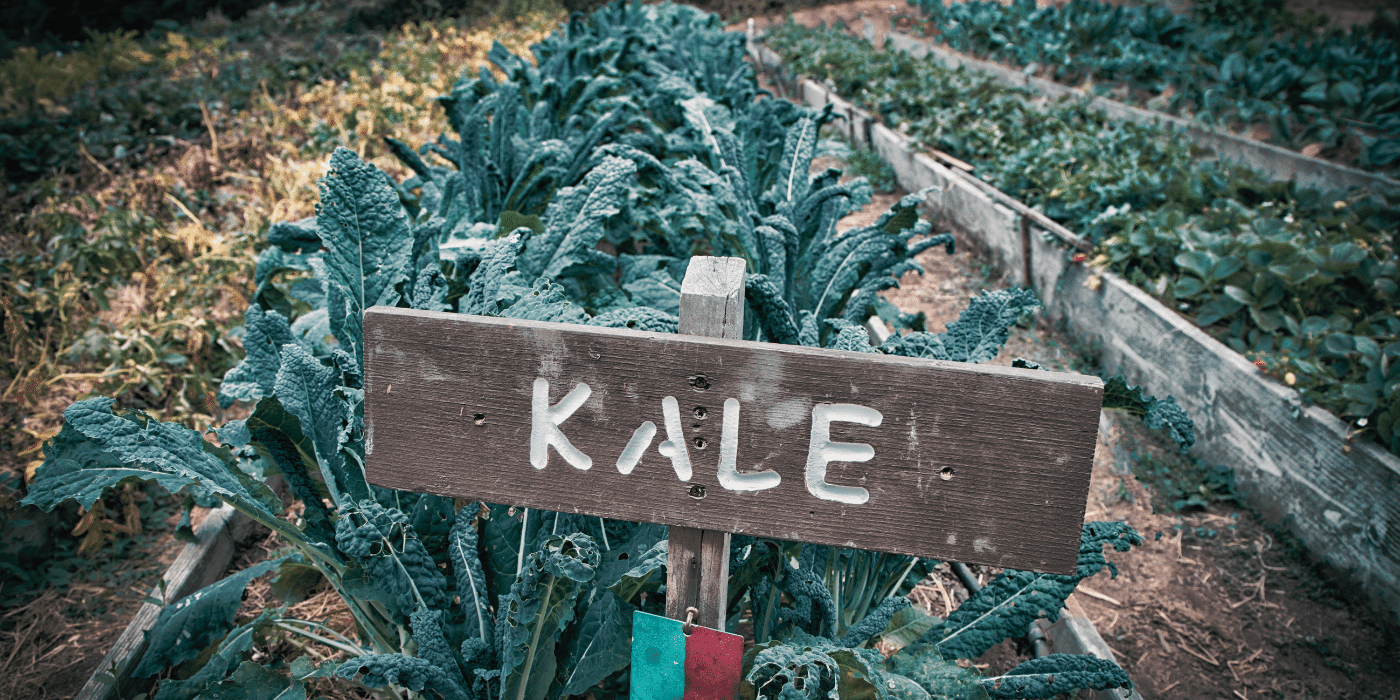
Blood Meal is an incredible helper for heavy feeders like squash, onions, broccoli, and leafy greens (especially kale, spinach, and mustard). It provided a long-lasting boost of nitrogen while also increasing soil acidity (lowering pH).
Here’s another neat use for Blood Meal: it can deter certain pesky garden visitors like rabbits, deer, and squirrels. It can also help protect your precious plants against squirmy plant-eaters like slugs and snails. It’s the blood meal’s strong, distinct smell that repels these pests from your tender crops.
Using natural pest control methods like applying Blood Meal as part of an Integrated Pest Management (or “IPM”) practice is essential to regenerative agriculture and its power to heal the planet.
As you can see, Blood Meal is no scarier than other supplements/ingredients that come from animals, like our Seabird Guano or Bone Meal.
Learn more about the organic ingredients we use in our plant foods.
Is Blood Meal safe to use in my family garden?
Abso-spooking-lutely! True Organic Blood Meal is perfectly safe to use in an edible garden.
Like every single one of our products, True Organic Blood Meal is ISO 22000 food safety certified by Bureau Veritas, which is the world’s highest food safety standard.
Let’s look at out some of the most essential steps of that safety-ensuring process:
“Kill step”
Okay, this is very intense-sounding, but the “kill step” is simply when materials are put through high heat to “cook” off. This step is a crucial part of the process that can be compared to making sure the meat you cook at home is cooked-through at the proper temperature. We process our plant foods at a high enough temperature and long enough time to eliminate pathogens while maintaining the potency of the ingredients.
Process separation
Process separation is a huge part of food safety, too. It involves handling of raw materials separately from every other step of the manufacturing process, just like you are sure to wash your hands, knives, and cutting board after handling raw meat.
Lot separation & testing
We process, test, and pack in “lots,” or batches, which are numbered and tracked, so that if there ever were a rare problem with any of our products, consumer notification and recall would be swift, easy, and thorough.
The fact is that a lot of animal byproducts are time-tested, powerful fertilizing agents. Ingredients like guano, manure, blood, and bone have been used in food-growing practices for a very, very long time.
Now, with modern production and food safety methods, we can make sure what you’re putting in your garden is sure to be pathogen-free.
See? Nothing to be scared of here! Check out what else is involved in our food safety standards.
How is Blood Meal made? Where does it come from?

The blood we use comes from organically raised livestock that has been processed through slaughterhouses. The coolest part about Blood Meal is that it’s made from an animal byproduct that would otherwise be discarded as waste.
We get our blood from cow-processing facilities. After processing, the blood is dried, then goes through our proprietary process of being turned into that nitrogen-rich, shelf-stable, easy-to-use granular plant food you get in the bag.
As part of our commitment to restoring the planet’s health through everything we do, the blood we use to make True Organic Blood Meal is an upcycled ingredient. We’re actually rescuing it from becoming waste!
We secure blood from slaughterhouses that process cows for meat and other purposes, making sure even byproducts are used with the intention to nourish the planet.
Not only does that contribute to our zero-waste production line, it helps various parts of the agricultural industry work together to create a circular economy: a model in which all byproducts are reused, recycled, or upcycled.
How to use Blood Meal
While our organic Blood Meal offers a wealth of benefits, it’s important to be mindful and use it judiciously, just like any other fertilizer or supplement.
Measure, mix, and apply thoughtfully.
First and foremost, Blood Meal is a very powerful fertilizer. That 12-0-0 ratio tells you just how powerful!
Many single-ingredient plant foods share this characteristic (think of our single-ingredient products like nature’s fertilizer in their purest forms). Its potency can make it less “forgiving” than some of our multi-purpose, balanced-ratio blends.
Be sure to follow the recommended mixing and application rates. Using excessive amounts can lead to nutrient imbalances and potentially harm your plants.
Be mindful of your soil’s pH.

Blood meal can slightly increase the acidity of the soil, so be aware that plants which thrive in more neutral or basic soil pH won’t love Blood Meal. It’s a great idea to perform a soil test and consult plant-specific guidelines before using blood meal on these plants. Take a look at our complete guide to soil testing to learn more.
You also wait to avoid using Blood Meal on seedlings — it’s just too intense for those baby plants. We recommend our organic Liquid Preplant Starter for your new plants.
Wash your hands after using.
True Organic Blood Meal is food safe, pet-safe, and kid-safe which means it’s tested to be free of pathogens and doesn’t contain any toxic chemicals, but you still don’t want any agricultural supplement getting into your mouth, eyes, skin, and…wherever else soil goes.
So always wash those paws after working in your garden!
Learn more about storing your True Organic plant foods for long-lasting performance and safety.
Show us your True Organic Plants
#GrowWithTrue
www.trueorganic.earth
Living Our True Organic Sustainable Values
September 27, 2023
Chancy Lanier
Living Our True Organic Sustainable Values
Sustainability is woven into everything we do at True Organic, from the foundation of our mission to the powerful natural ingredients in each bag.
Every year, we advance our carbon-negative trajectory by delivering millions of pounds of enriching carbon to agricultural soils.As a 20-year-old family owned company with deep roots in organic agriculture, we’ve always had an eye on what “sustainability” really means — and what it means to be in the business of planetary health. What’s certain is that sustainability isn’t summed up in any simple action or any single product. By approaching sustainability as a complex web of long-term practices and staying adaptable to ever-changing climate needs, we can have a powerful impact on healing the planet.
Our founder, Jake Evans, launched the True mission to heal the nation’s soil by making high-quality organic fertilizer for American farmers. Let’s explore how we’re staying true to our promise 20 years later.
We rescue powerful agricultural ingredients from the waste stream.
 Many of our products are made from materials that would otherwise be seen as (and treated as) waste.
In a way, our dedication to sustainability is right there in the bottle or bag: valuable natural materials that would otherwise become unused landfill waste (or be left to contaminate waterways and natural habitats), repurposed and processed into safe, effective, earth-friendly plant foods.
We use ingredients from agricultural processing like poultry manure, bone, blood, egg shells, shrimp shells, and other kinds of “waste” — yep, we’re turning what most people consider waste into plant food that nourishes the planet and your garden. How’s that for sustainability?
We also get byproducts from plant-based ingredients like reduced sugar molasses and corn steep liquor from beet sugar production and corn wet-milling.
These ingredients are captured before they enter a waste stream. This process not only eliminates unusable waste, it also means that True products are harnessing nature’s own best supplements to nourish soil.
By diverting valuable natural materials from landfills or waterways, we contribute to a circular economy where materials never become waste, and nature’s power gets to live on, regenerated as a soil-loving boost to your garden.
Plus: Our entire operation line is zero-waste and we focus on bioprocessing (as opposed to synthetic chemical manufacturing).
We’re supported by a team of scientists with expertise in planetary health and sustainable food production.
 For two decades, we’ve served the biggest organic farms in America, and our development teams have been working closely with farmers to help advance long-term sustainable food production. By developing optimal organic crop fertility programs that are carbon rich, improving soil microbial activity and diversity, and helping organic growers produce healthy, safe, environmentally friendly crops with good yields so that growers can be financially successful.
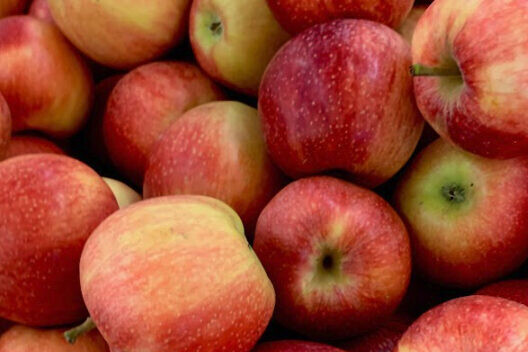
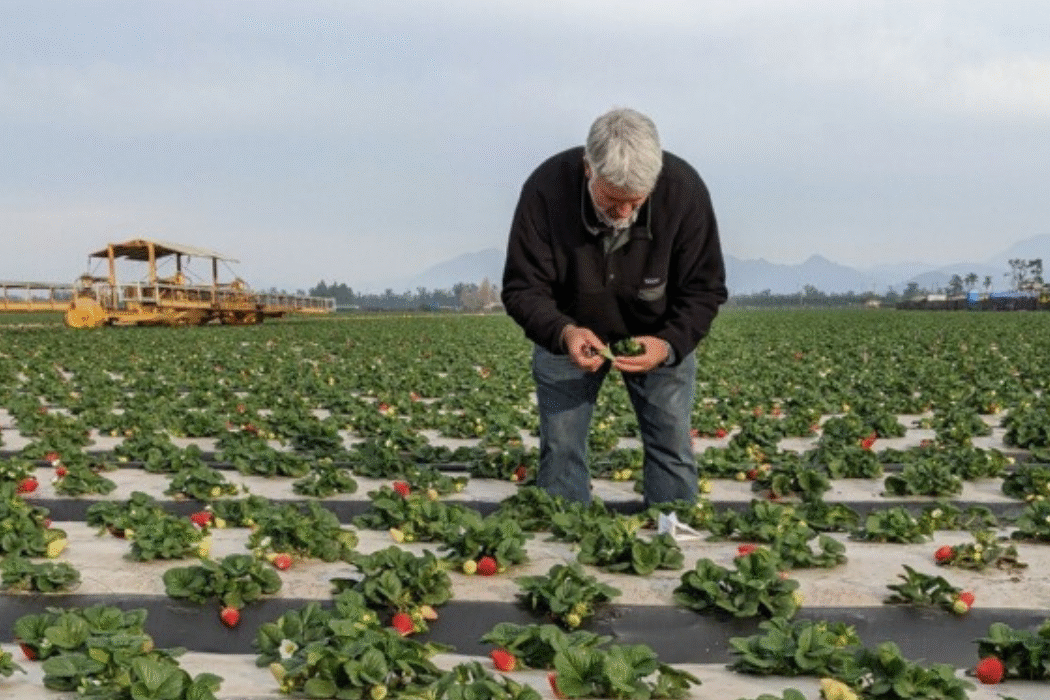
Our field and lab research and our product development is backed by scientists and farmers with deep knowledge about soil health and sustainability. Our R&D team partners with the growers who use True to optimize organic fertilizer programs for a wide range of crops, spanning the Western United States and Baja Mexico. From organic apple production in Washington to organic almond production in California’s Central Valley and organic strawberry production on California’s Southern Coast.
These in-house teams of experts in agronomy, chemistry, and food safety ensure that our practices are grounded in science and aligned with our commitment to overall sustainability, waste reduction, and soil regeneration. Meet our R&D Team!
True Organic plant foods promote the wide-ranging planetary benefits of organic growing.
The most obvious way we commit to sustainability is through our products and their impact on climate health. How does organic agriculture contribute to the planet’s health? We’re glad you asked!
Compared to conventional agriculture, organic growing methods:
- Provide carbon and an energy source for soil microbes, helping them do the amazing work of making soil a living web that sustains life on our planet
- Make soil easier to work, helping farmers grow more food with less effort and additives
- Reduce the negative environmental effects of pesticides, heavy metals, and other pollutants
- Increase soil’s ability to properly retain and drain water, reducing runoff and flooding
- Encourage better plant root development and penetration, making crops healthier and hardier
- Help soil trap carbon from the atmosphere (read more about carbon sequestration)
- And supply, store, and retain nutrients that plants need most, supporting plant health — and therefore planetary health. It’s all connected!
Curious about how it all works? Read more about how organic and regenerative farming techniques can save the soil that can save our planet.
We stay adaptable and future-minded, continuing to research even more impactful sustainability efforts.
 For us at True Organic, sustainability means going all-in toward a future on a healthy planet.
That means committing to long-term views and plans that have room for both determination and adaptability. As we continue to grow and learn about our impact on the environment, we’re constantly updating our practices and sustainability commitments.
What does that mean in recent years and going forward? Here’s how we’re deepening our sustainability commitment right now:
- We’re working with new ingredients like biochar to promote regenerative organic agriculture, not only improving soil health but also storing sequestered carbon in the soil for over 1000 years.
- As we expand our production facilities to keep making premium organic fertilizer for more growers big and small, we’re putting more attention on measuring and tracking our facilities’ carbon footprint — and downsizing it.
- We hope to keep influencing the larger agricultural sector by making it easier for farmers to use organic and regenerative farming practices, as well as pressing for organic policy and expansion.
When we talk about innovative, sustainability practices, that’s what we do every day at True Organic: by “making organics work” for the farmers who grow our food to the backyard gardeners who just discovered their love of soil.
Show us your True Organic Plants
#GrowWithTrue
www.trueorganic.earth
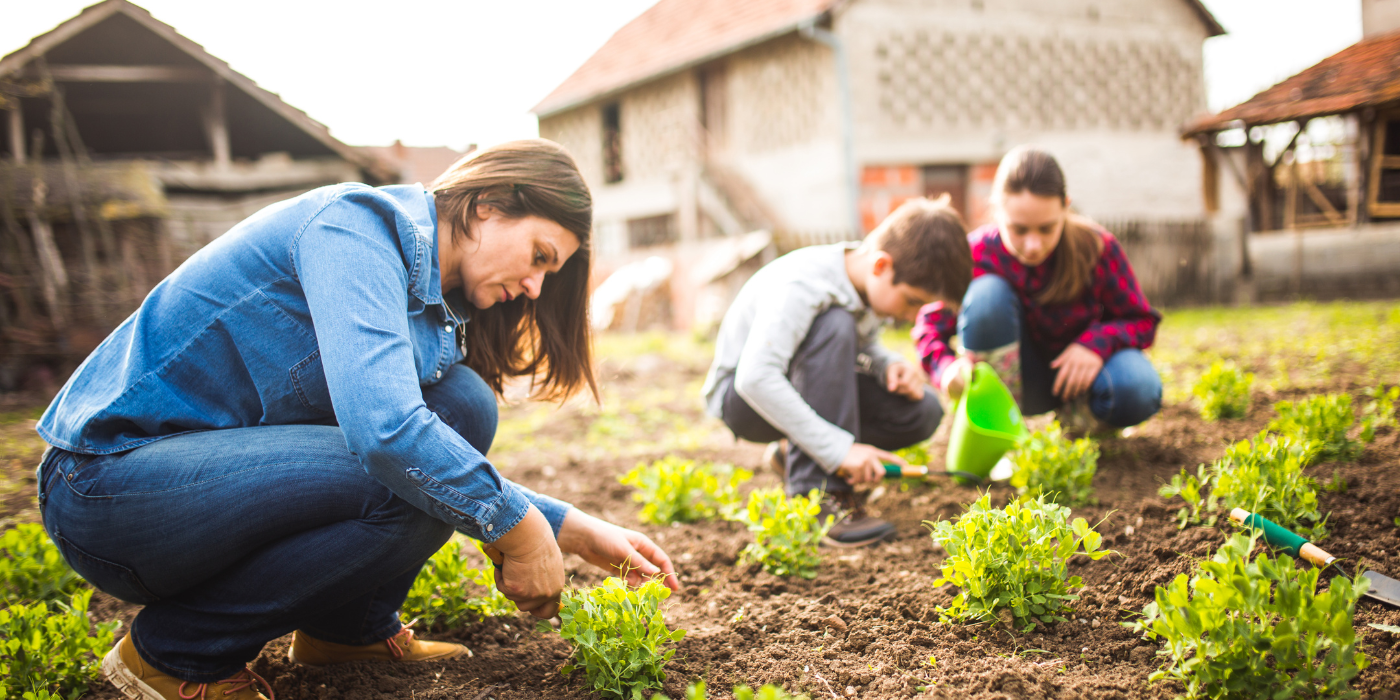
5 Gardening Tasks That Build Healthier Soil
September 8, 2023
Chancy Lanier
5 Gardening Tasks That Build Healthier Soil
Can you feel fall in the air?
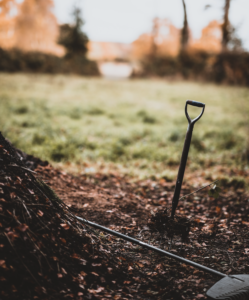
As sunsets get earlier and cool weather approaches, it can sometimes feel like the year’s gardening fun is coming to a close. As the growing season ends, it’s soil-building season.
Even if you live in a year-round temperate climate, early fall is the ideal time to support your garden’s soil. Admittedly, some of the best fall garden chores can be the dirtiest — or should we say the “soil-iest”? — but seasoned gardeners know that getting some organic matter under your fingernails is one of autumn’s greatest joys.
By doing these tasks in your garden now, you’ll rebuild soil’s organic content, prevent erosion, and support soil structure for a happy spring garden.
1. Clean up debris and spent plants to protect against disease.
 Removing the season’s annuals not only clears space for the rest of your fall chores, it also helps ward off pests (both insects and scavenging birds/mammals) and disease-causing pathogens that can thrive on dying plants in moist weather.
Rake up and remove fallen leaves, weeds, sticks, twine, and rocks, too. If you have a functioning compost operation, toss your plant-based “waste” in there — but be sure not to put any diseased plants or major pest infestations into the compost! If you don’t have a home compost system, put plant items in your curbside green bin.
Pro tip: Try your best to keep organic matter out of landfills, where its natural potential to transform our planet’s soil is stopped short.
2. Test your soil to pin-point what it needs.
Want to get down to the nitty-gritty details of what exactly your soil needs to thrive? Soil testing is your key.
When you know what nutrients your soil is lacking, you can add the perfect supplements and amendments to adjust pH, structure, and nutrient makeup. You can even plan your over-winter cover crops and spring garden around your soil test results!
So how does soil testing work? Read all about soil testing and how to interpret results in our interview with Margaret McCoy, PhD, our resident soil ambassador.
3. Add organic nutrients to support soil microbes and healthy spring soil.
 Adding organic plant food to your soil in the fall is one of the best ways to improve its health and ensure a robust, happy garden next year.
Throughout spring and summer, your growing plants use the organic matter and nutrients in soil that microbes have broken down (thanks, microbes!). Over time, those nutrients are depleted. But the natural seasonal cycle gives soil a built-in renewal period: fall and winter!
Help soil out by adding an organic supplement to your top soil. You may choose what specific foods your soils might need based on your soil test (for example, if your soil pH is too high, you may want to add Prilled Sulfur to make it more acidic). Or, if you’re looking for a general soil boosters to infuse slow-release nutrients into your garden, you might try Seabird Guano.
Apply according to directions, gently mixing fertilizer into the top 8 to ten inches of soil. Water moderately and the living world inside soil will do the rest!
What about tilling? Historically, tilling was touted as a top fall chore because it’s a fast way to “open” soil structure and stimulate soil microbial activity. But aggressive, frequent tilling in seasonally-used areas can be more harmful than it is productive. It can further degrade organic matter and cause erosion. Save heavy tilling for when you want to turn untouched earth into garden beds. It’s not needed for soil that’s been well-tended seasonally.
4. Plant a cover crop (and other cool weather crops) to protect and replenish soil.
Yep, early fall is a great time for planting certain crops! Plant cover crops and other cool weather crops with enough time before the first frost for the plants to get strong and sturdy.
Cover crops are plants that cover soil almost like a carpet. They are grown specifically to help improve soil health and are one of the best things you can do for your soil — and yet one of the most under-utilized in home gardens.
By planting cover crops in your garden in the fall and leaving them to grow through the winter, you’ll naturally help:
- Prevent soil erosion
- Encourage soil aeration
- Add organic matter to the soil and fix essential nutrients into soil
- Keep soil microbes happy and active
Some popular cover crops include clover, rye, vetch, wheat, some types of peas, and many types of legume.
Now’s the time to plant cool weather veggies, too. Depending on your climate zone, you may have a lot to choose from! Winter veggies, just like cover crops, support soil health in a multitude of ways…and they sure are tasty in winter stews and roasts.
5. Mulch open beds and annuals to protect them throughout fall and winter.
Mulching your garden beds is an awesome way to protect against soil erosion and keep soil warm and moist as weather turns chilly.
Mulching also suppresses weeds, supports soil drainage, and promotes soil health by encouraging the microbial life within soil to do its slow, essential work of breaking down organic matter into nutrients plants need.
By dedicating some time and effort to these essential tasks, you’re not just nurturing your garden; you’re participating in a timeless cycle of renewal that ensures the health and productivity of your soil for years to come. So, embrace the crisp air of autumn, get your hands a little dirty, and rest assured that nature’s slow and steady processes will reward your efforts with a bountiful and flourishing garden when spring arrives once again. Happy gardening!

Show us your True Organic Plants
#GrowWithTrue
www.trueorganic.earth
The Love of Gardening with Instagram Creator & DIY Garden Educator Cassandra Smith
August 28, 2023
Chancy Lanier
The Love of Gardening with Instagram Creator & DIY Garden Educator Cassandra Smith

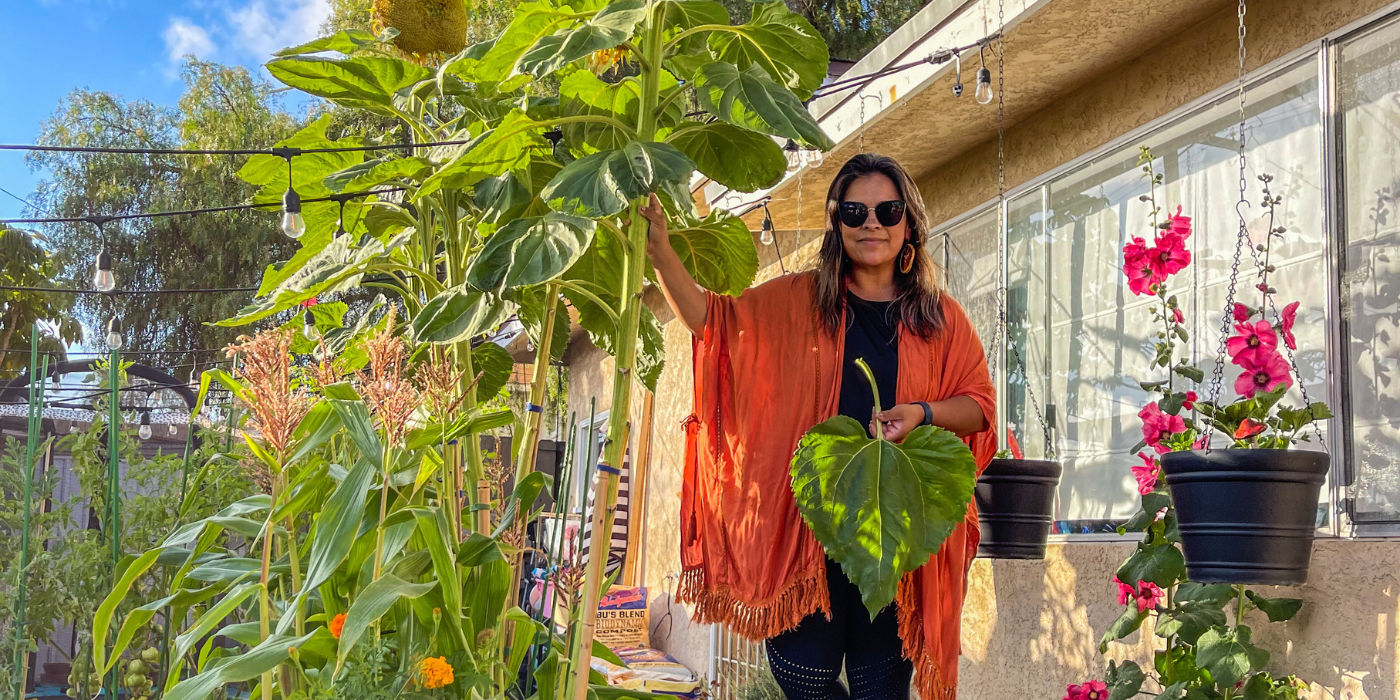
Have you ever wondered what it’s really like to be an Instagram gardening influencer? We sat down with Garden Educator Cassandra “Cass” Smith aka @gardentotablewithcass to find out — and it turns out it’s more about the love of gardening than anything else!
Cass is a talented content creator, DIY garden education coach, and was one of our first Instagram friends! 🥰 And she’d been a steadfast supporter of True Organic since she first spotted the lineup of colorful bags at her local garden store.
Cass doesn’t only run one of the most fun, inspirational, and informational gardening Instagram accounts around, she also co-founded San Diego Seed Swap and continues actively expanding community gardening in San Diego and beyond. She shares her story with us…
True: How did you get started with your garden? Were you always a plant lover?

Cass: If we go way back to the very beginning, it started when my daughter got one of those cute “seed bombs” as a gift, full of tomato seeds. It was so strange to me. I thought to myself, ‘Who would give somebody seeds as a birthday gift?!’
I left it sitting for quite some time. When we finally planted it, I didn’t know what to do with them! I didn’t really do much at all to care for them. I’d tried a garden in 2012 and it failed; I actually had everything removed that needed heavy water and work. I didn’t have an affinity for plants.
But this time, with the tomato seeds, I did one thing differently: I planted them in quality soil. And that’s only because I happened to see the “nicer” bag of soil at the store and thought, “Well, it’s just one pot, it’s no big deal.”
To my surprise, the tomatoes grew! They weren’t huge or gorgeous (like I’m able to do now); they were scraggly, but we got a good sized bowl of tomatoes. And they tasted amazing! I had never ever ever had any homegrown produce.
I thought to myself, “WOW. If this is what a cherry tomato tastes like, I wonder what else we can do?”
We started growing an eight-by-eight area of containers and some in-ground trees. My mom helped, the kids weren’t interested in it yet…it was just kind of a thing we had in the backyard and took care of it if we had time. It wasn’t a focus for me.
When I look back, I’m kind of shocked because I feel like a different person. Now I’m that person who is gifting people seeds!
True: When did all that change? How did gardening become a focus for you?
Cass: In 2020, I started working from home. I’d been an event professional working at a museum job that I loved for 20 years, but that year, I started to wonder how long it would last. As we started spending more time outside — everybody did! — it became our refuge.
I had a huge backyard, a tiny area of plants, and all this time on my hands. Being outside really gave me a sense of calm and connection to nature that I’d never felt before. I just started to increase the garden. And in 24 months, I went from 10 containers and a few trees to having 100 grow bags, 8 raised beds, and tons of makeshift containers. I had vintage trunks sitting in storage and I said, “Hey, this is a raised bed!”
After the first year of lockdown, I started growing an edible garden at the museum and using the food to cook in the museum café. It all just started to blossom and grow!
True: And how did you start sharing and teaching on Instagram?
Cass: I was looking to connect with people in San Diego and I wanted to learn along with people I could talk to naturally. Someone invited me to a Facebook group for gardeners, but it was people from all over — not just local.
Back then, I thought Instagram was just for famous people and we were all there to watch! All I saw were ads and celebrities. People had amazingly curated feeds, and I had no idea how any of that worked. But somewhere in there, I saw a plant page, clicked on it, and started to realize there were so many niches and areas of interest on Instagram.
So I thought, “Why don’t I just start a plant page on Instagram?” And suddenly my page went from 100 followers to 1000 followers in a month. (Now she’s got over 21,000!)
True: Wow! What do you think drew people in?

Cass: I was never focused on “growing my following,” I was interested in sharing what I was doing and finding people to learn alongside. And finding people in San Diego!
People who knew nothing about gardening thought it was kind of like, “I grew this…but I’m not sure how!” People connected with that.
A few months after I started my account, Reels came into the world, and that was huge. I never took videos or pictures of myself or wanted to show my face (I wouldn’t even pick up a FaceTime call!) — I’ve always wanted to be behind the scenes.
But once I got in front of the camera, I realized people just genuinely wanted to know more about who I was and I knew that being like everyone else wasn’t the way to do it.
What I was doing was authentic and Reels brought in a new level of authenticity. My goal was just to have fun. But once I got “viral,” I learned more about how to spark people’s attention, inspire them, and stay true to myself.
True: What’s going well in the garden right now? Any surprise successes?
Cass: The corn is going great! I thought it was going to be a miss, because I thought I’d accidentally double-fed it. They shot up to seven feet tall but weren’t growing any ears — just foliage and long silks. I’ve never seen silks so long. I could brush them!
Then suddenly, they started growing these huge ears! They’re bigger than store-bought. It taught me something: when I double-fed at the point between transplant and when the plant was really thriving, that “over-feeding” was actually good for growing bigger ears.
I was hoping to get the Guiness World Record but I saw that the record is about 16 inches. Mine’s about 14. 😉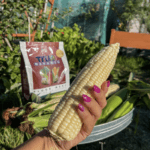
True: What’s not going so good in your garden this year?
Cass: My grapes. Last year we had tons of grapes but they’re just not thriving right now.
Everything was going good: we got rain, fruit started to form…but then they just stopped thriving. Once the rains ended, the leaves started getting a disease. I looked into it and it looks like Anaheim disease (also known as Pierce’s disease) — something that happens to a lot of grapes in Anaheim. Although I’m further South, it can spread. So I’m not sure if it was something I could’ve prevented given our climate or if it was something I did. Given that I have a lot of plants, I do occasionally miss somebody when it comes to watering and feeding.
I just take notes, do the best I can, and use what I learned for next year. And, of course, use quality organic ingredients to nourish the plants and soil.
True: What are the hardest parts about growing a garden as large as yours?
Cass: Keeping up with organic pest management — since we don’t spray (any pesticides), we really try to do what we can with the spritz of a hose or picking off pests by hand. (Key principles of integrated pest management!) But all of that starts with curating our soil, so we take a lot of time and effort to make sure we take care of all the plants’ needs. Hand watering and feeding are two of our biggest chores, but we know that taking care of our soil and plants will provide us with all of that yummy garden goodness.
True: So you were using social media to find local gardeners to learn with…and now you’re teaching people all over the world, running your local seed swap, and more! How does that feel?
Cass: I am absolutely floored! I’m so thankful that I have the opportunity to create content…but mostly that I get to connect with folks who also have a hope and vision to create a brighter future. That makes me feel like I have a purpose to help others — and this is the way I’m going to do that.
True: What does your future have in store?
 Cass: Going forward, I want to make bigger connections so we’re able to reach young people in San Diego and show them that all of us can do something small in order to make a greater impact. San Diego Seed Swap is going to be the conduit to connect the community to the resources to achieve their goals.
My vision for my own future is bigger than just expanding the garden. I’d like to build a family compound and start from scratch: build a sustainable home from shipping containers and building dwellings for my children so they can continue to build and live on the land. That’s my ultimate goal for my garden and for my family.
The goal for my Instagram work is to keep serving my community by sharing what I learn in the garden. I want to keep inspiring everyone who wants to learn how to do things for themselves, from making your own homemade syrups to growing your own sponges.
True: What are some of your favorite things about having a garden?
Cass: We love to make a meal with our barbeque or smoker from items we grew in our garden and enjoy it at sunset. And we obviously love harvesting! The kids love harvesting tomatoes and cucumbers and especially watermelons — and really any fruit.
What makes me happiest is seeing something go from a tiny seed into a full plant that’s providing nourishing food for my family. That’s so important right now because — well, quality isn’t always easily accessible.
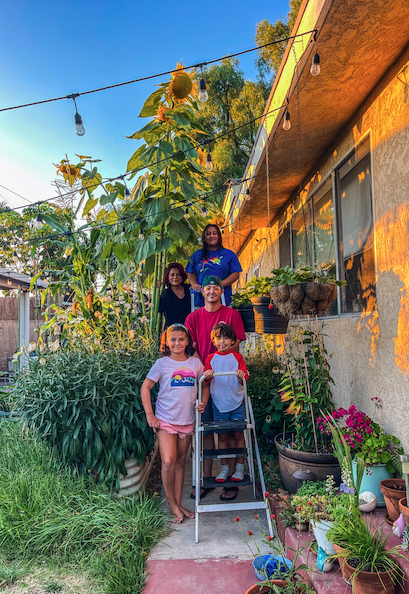
We asked Cass’s kids what they love about the garden too! Here’s what they said:
“I just like waking up and looking at it while I’m eating breakfast — it’s beautiful!”
“Whenever we need some vegetable or fruit, we can just go outside and pick it. We don’t even have to go to the store.”
“Something that makes me happy is being educated on what we can grow here in our area — what fertilizers we need, what can we use as compost, all of that!”
“I like giant flowers! All kinds of flowers.”
“I love that it provides a lot of food for our family.’
“I love when I walk outside I can see a whole world of plants.”

Show us your True Organic Plants
#GrowWithTrue
www.trueorganic.earth
Succession Planting: Maximize Your Garden's Potential with Continuous Harvest
August 4, 2023
Chancy Lanier
Succession Planting: Maximize Your Garden’s Potential with Continuous Harvest
Do you want to maximize your garden’s yield, grow a wider variety of crops, and reduce wasted food? You want to try succession planting!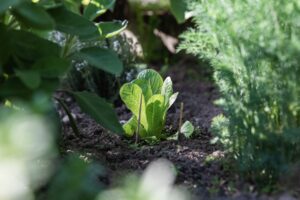
Extend your growing season and grow more food with succession planting: staggered planting for extended harvest opportunities. With just a bit of extra planning and time in the soil, you’ll be cashing in on bountiful garden harvests from spring into late fall.
Let’s check out how succession works, its benefits, and some top tips for getting it started in your home garden.
What is Succession Planting?
Succession planting is the practice of planting at staggered intervals to produce harvestable crops continuously, for an extended period of time. It maximizes space by allowing you to produce more food (or flowers, herbs, whatever!) over time and can transform your garden into a non-stop buffet of ripe-and-ready veggies.
As you can imagine, succession planting does take a bit of increased planning and work as compared to one-and-done seasonal growing.
But one of the most wonderful things about planning for succession planting is how sharp your gardening skills will become as you explore the proper intervals, learn new techniques, and get to know the crops you love to grow and eat.
Some crops can be planted every two or three weeks (like lettuce), but some (like tomatoes, squash, and cucumbers) need longer intervals.
Also consider how much of each crop you want during each period of your growing season. If you love salads with lettuce, carrots, and peas, you can stagger planting of those crops from spring through early fall to have delicious dishes for months!
Succession Planting for Beginners
 If you’re feeling overwhelmed with the potential complexity of succession planting, don’t worry — there are a variety of methods and you can start simple. Set yourself up with small goals; eventually you can work up to getting a continual harvest of a dozen kinds of crop from spring through late fall!
The timing windows for succession planting vary from a few days to a few weeks, depending on what you want to grow and where you live. Your own unique succession planting schedule will depend greatly on your Plant Hardiness Zone (aka Gardening Zone) and what you’re hoping to grow.
Here’s a standard chart laying out recommended succession intervals for crops like lettuce, corn, peas, carrots and squash.
Intervals for planting depend not only on your climate, but also on the maturation period for your crops — since your goal is to stagger harvest-readiness throughout the season.
The various methods for succession planting depending on the results you want. For most home gardeners, the goal is to get a diverse harvest that inspires culinary creativity for many months (not necessarily to get a ton of the same crop throughout the season, which is a technique that commercial farmers often use).
To begin, just choose a few crops that have a medium to short maturation period. It’s a great idea to use some cozy time in late winter to prepare for your spring, summer, and fall garden.
In fact, we wrote all about chores you can do in the off-season: check it out!
Planning Your Succession Planting:
Here’s how to prepare for succession planting:
- Peruse a seed catalog or month-by-month planting guide to choose which crops you want to grow.
- Consider the growing period for the crop you want, selecting a few with varying maturity periods that can grow in different parts of the spring, summer, and early fall in your Zone.
- Take crop rotation into account, too, which promotes biodiversity, soil health, and pest/disease prevention.
- Start by marking the first planting date in a calendar (a Farmer’s Almanac calendar or other garden-centric calendar is ideal).
- Then count forward and mark the date of expected harvest.
- Do you want to plant that same crop again once it matures and is harvested? If so, mark the next planting on your calendar. (Leave a little time for clearing the plot and fertilizing!)
- Now find the ideal planting date for your next-earliest planting.
- Repeat!
- Be sure to place your planting dates according to heat tolerance, sun exposure needs, and other factors that each crop requires.
Ready for more detailed planning? The University of Minnesota Extension provides even more meticulous detail about succession planting for more advanced gardeners.
Using a long-term garden journal works harmoniously with succession planting — and this blog teaches you how. That way, you can consider the location for each crop, too, depending on the sun’s movement throughout the year, changes in wind patterns, and even soil variations in your garden.
Best Crops for Succession Planting

The best crops for your succession planting project are crops you love! And, of course, the ones that grow best in your garden.
But here are some of the most popular plants for staggered planting and continuous harvest in many zones:
- For spring: Radishes, lettuce, spinach, peas, leafy greens, strawberries, cabbage, beans
- For early-to-mid summer planting: broccoli, cauliflower, beans, peppers, cucumbers
- For late summer/early fall planting: lettuce, squash, leafy greens, cover crop (like clover, mustard, vetch, legumes, or grain)
Yes, you can succession plant tomatoes (of certain varieties)! Check out how.
Your local garden store is a great source of more information about succession planting in your region. They may even have handy charts that you can take home, indicating the best crops and intervals for your garden.
Benefits of Succession Planting
So why bother with that extra work and organization? Succession planting offers many benefits. It can:
- Maximize space in your garden.
- Extend the growing season, allowing fresh food harvests into the fall.
- Reduce food waste by harvesting only what you need.
- Help manage pests and diseases with short growing cycles.
- Provide a valuable learning opportunity to experiment with different crops.
- Encourage continuous growth of gardening skills and nature knowledge!
Succession planting is a rewarding technique that allows you to enjoy a bountiful garden harvest all year round. With a little planning and experimentation, you can grow a diverse array of crops, reduce waste, and optimize your garden’s yield. Whether you’re a beginner or an experienced gardener, succession planting is a must-try method for any home garden enthusiast. Happy planting!
Show us your True Organic Plants
#GrowWithTrue
www.trueorganic.earth
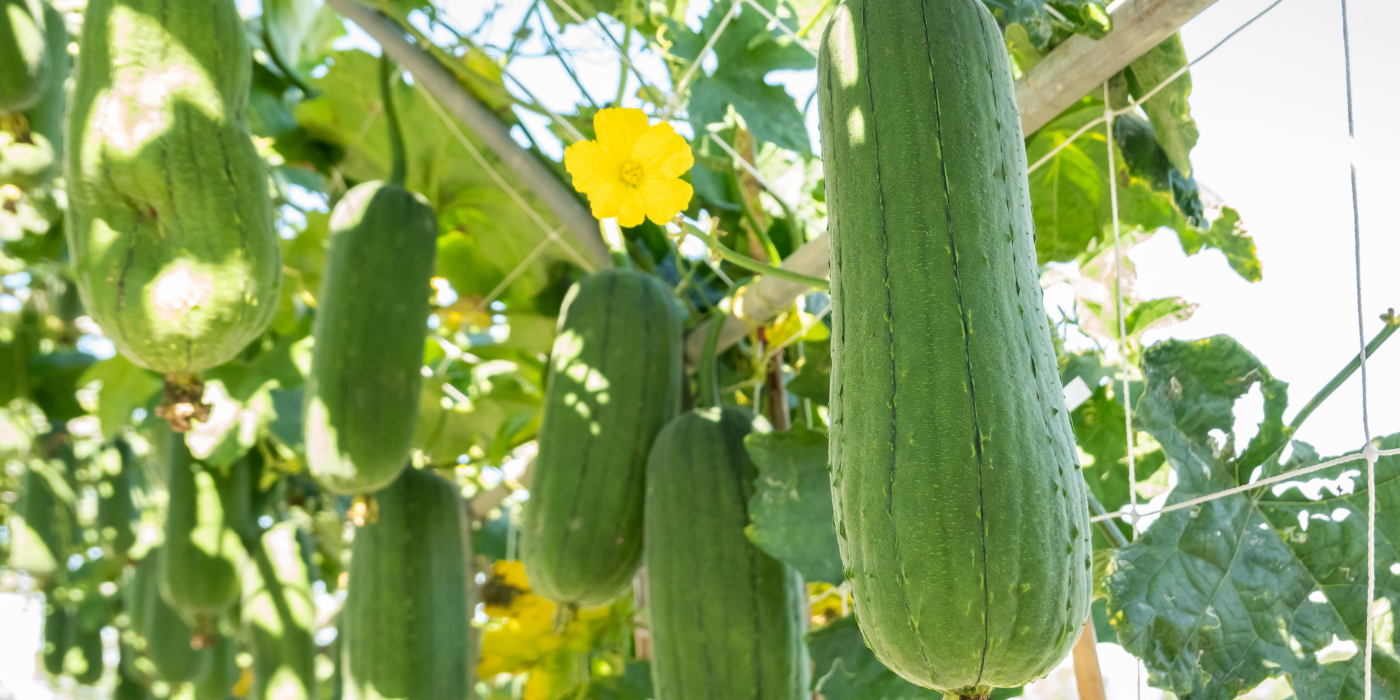
Homegrown Sponges: Growing Loofah in Your Garden
July 25, 2023
Chancy Lanier
Homegrown Sponges: Growing Loofah in Your Garden
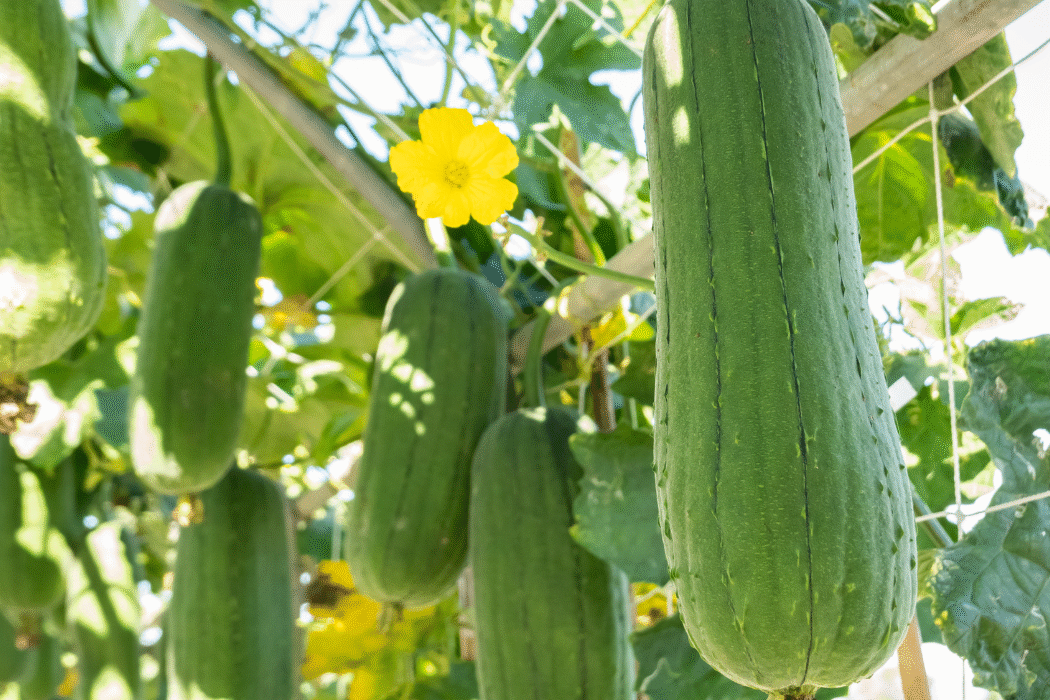
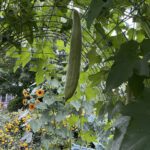
Forget about neon-colored, plastic bath sponges that never biodegrade! Scrub yourself clean with an organic, all-natural, biodegradable loofah that you grew in your home garden.
You’ve probably used real plant-based loofah, but perhaps you didn’t know they’re actually the fruit of a viney vegetable plant related to squash and melons. Homegrown loofahs make for wonderful body care accessories, household cleaning tools, and more — all completely biodegradable and renewable.
And guess what: they’re amazingly easy to grow and harvest right in your backyard.
What are Homegrown Loofahs?
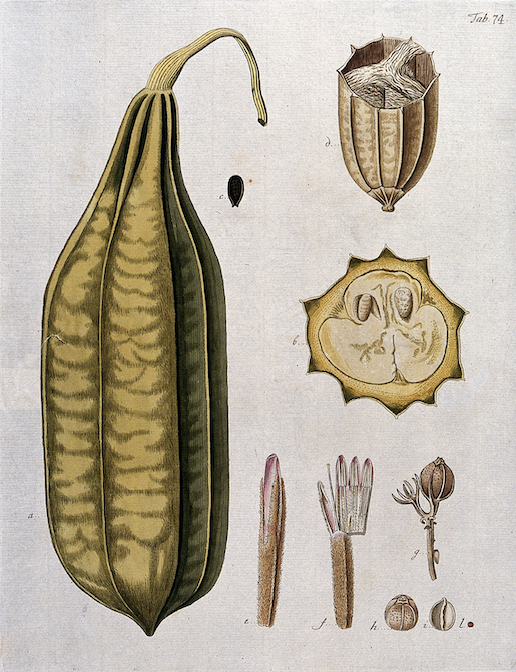
Contrary to some ill-advised product marketing you may have seen, loofahs are not the same as sea sponges — although those sea creatures can make wonderful skin scrubbers, too.
Loofah “sponges” are actually dried gourds; they’re the fruit of the luffa, a tropical plant that belongs to the Cucurbitaceae family (along with pumpkins, cucumbers, melons, and other hard-shelled gourds). Luffa vines produce delicate, crinkly yellow flowers much like other squashes and drooping oblong fruit that have been used for culinary and domestic purposes for thousands of years.
Luffa and loofah can be considered interchangeable spellings for the same plant and gourd, but for purposes of this blog, we’ll use “luffa” to refer to the plant and “loofah” to refer to the fruit of that plant.
Luffa plants and their fruit have been grown, eaten, and used for thousands of years — as a culinary ingredient, medicine, cleaning tool, and even engine filters!
Growing luffa plants is fun and simple, if you pick the right location and set-up. Here’s how.
How to Grow Loofahs at Home
Growing loofahs at home is a fun and rewarding experience, provided you follow some essential guidelines. Here’s what we’ll cover in this blog:
- There are two species of luffa and a number of different varieties; all will produce a fluffy sponge when dried.
- Luffa seeds need warm temperatures to germinate.
- Luffa plants need full sun and a long, warm growing season to mature (5-6 months)
- You’ll want to allow the gourd to mature and then dry on the vine in order to use it as a bath tool.
- Luffa plants grow long vines (sometimes up to 30 feet) like pumpkins.
Choosing Your Luffa Seeds
There are two species of plant that produce the familiar scrubby sponge-like object that you can use in the bath: Luffa aegyptiaca (aka ridged luffa or Chinese okra) and Luffa acutangular a.k.a. Luffa cylindrica (aka smooth luffa). You might find either in a seed catalog or garden store, or you may just see the seeds listed as “luffa seeds.”
“Ridged luffa” produce (you guessed it) more angular gourds with long ridges, while a “smooth loofa” plant will grow a rounder gourd with less prominent ridges. As far as growing and using them goes, the two species are pretty much the same. Grab whatever seeds you can find and let’s get planting.
Planting & Growing Luffa in Your Garden
Luffa plants need full sun and well-draining, nutrient-rich soil. They require a long, warm season to ripen and dry on the vine. Luffas are climbing plants, so you’ll have the most success if you provide your luffa with a trellis or fence to grow on, or plenty of ground space to spread out.
Need some trellis inspo? We’ve got you covered!
Before you plant, whether in-ground or in a container, give your soil a measured supplement of organic plant food. A granular fertilizer with a balance of nutrients from organic ingredients will help your luffa establish strong roots and produce healthy fruit.
Check out our Container Gardening 101 guide for all the info you need to start a flourishing container garden inside or outdoors.
Luffas need a consistent temperature of 77-80°F to germinate, so it’s common to start them indoors — unless you live in a sunny climate with endless summer 😎 in which case you can start the seeds outdoors after the last frost of the year. But remember that, if you want to use the loofah gourd as a bath sponge, it needs to mature on the vine for 5-6 warm months.
Expect germination in about 20 days. Transplant them outdoors only when the risk of frost has passed.
Keep their soil moist by watering regularly and give them a boost of organic fertilizer every two or three weeks (we recommend True Organic Liquid All-Purpose Plant Food).
Harvesting & Peeling Your Loofah
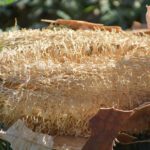
The time has come to reap the rewards of your loofah gardening efforts. To get the scrubby sponge-like object for bathtime, allow the luffa gourds to mature on the vine until they turn yellow or tan. The skin of the gourd may even turn dark brown and begin to crack.
Carefully snip the mature loofahs off the vine and peel the skin to reveal the fibrous, spongy insides. Peeling the loofah can be a little tricky. If you’re struggling, try these tips:
- Starting peeling from any existing cracks in the skin
- If there are no cracks, gently squeeze the loofah until the skin cracks
- Soak the loofah in water for a few minutes to loosen the skin
- Remove the seeds (just give your loofah a shake), which you can dry and save to plant more luffa plants next year.
- Wash the peeled “sponge” with water and a little bit of natural soap to remove any sap or extra skin. Then lay your peeled, washed loofah in the sun to dry (turning occasionally).
Explore More Awesome Uses and Benefits of Luffa Plants 

Luffa plants offer more than just bath sponges. Explore other exciting uses and benefits:
- Edible blossoms: Use the edible blossoms. Just like squash blossoms, the luffa’s lovely yellow flowers are edible and yummy! Carefully pick them off the vine and rinse gently. They make for a beautiful addition to salads or a tasty deep-fried treat.
- Kid-Friendly Art Projects: Cut the dry gourd into slices and shapes for kid-friendly art projects. Try them as stamps, brushes, and stacking blocks!
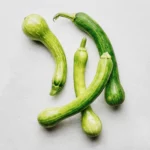
- Delicious Vegetables: Eat the vegetables! Young loofahs have a texture a lot like zucchini and are common in some Asian and African cuisine. They don’t need to be peeled and are tasty in stir fry!
Discover the Joy of Growing Your Own Loofahs: Start Cultivating Today
Growing loofahs in your garden is a rewarding experience that brings forth a wealth of eco-friendly and versatile benefits. Follow our simple guidelines to nurture these fantastic plants and enjoy a bountiful harvest of organic, biodegradable loofah sponges for all your body care and cleaning needs.
Show us your True Organic Plants
#GrowWithTrue
www.trueorganic.earth